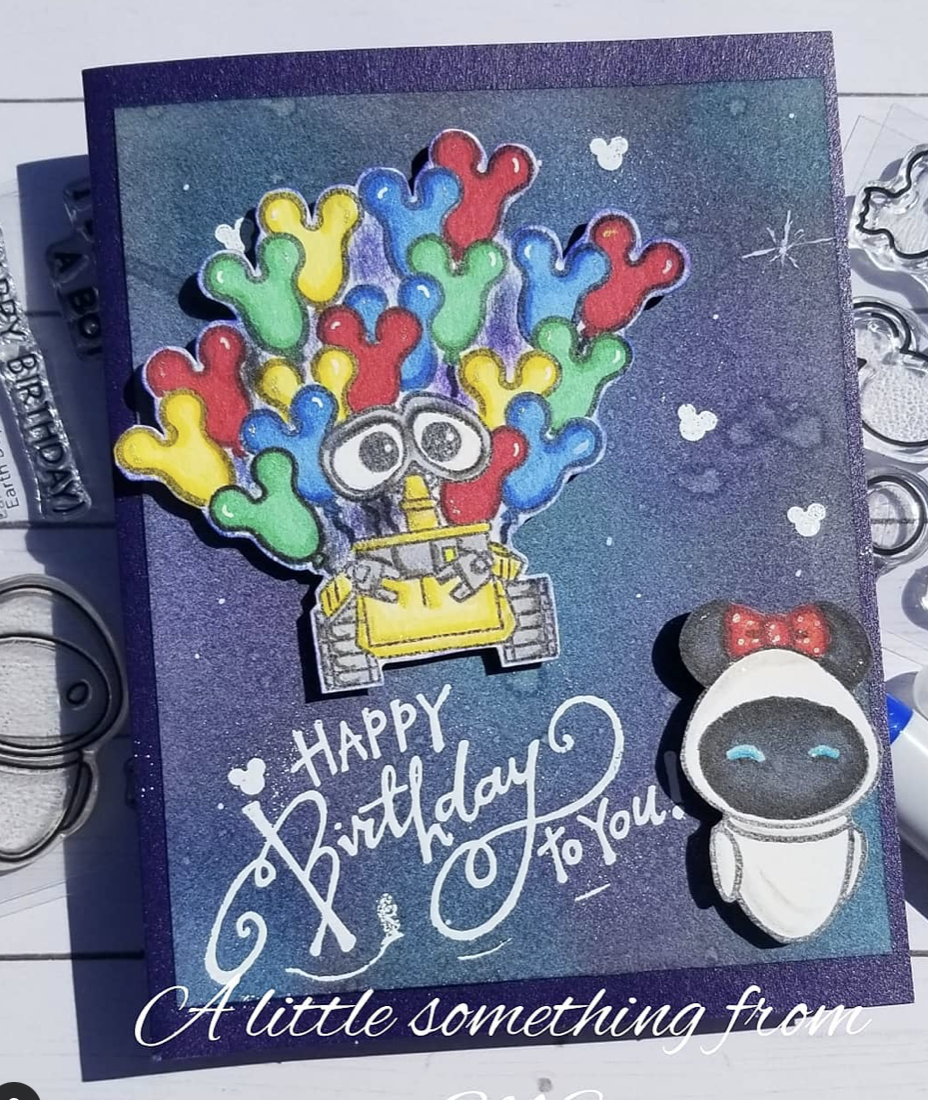
The combination of brands that are being combined to make these works of art is genius! Long gone are the days of sticking to one brand for creating a whole card. Now, creators are putting together scenes with one brand, using characters from another brand, and adding texture with another.
If the scale is right, go for it! Stamps that would otherwise be used in journals, planners, bujos, or memory keeping are now pairing well with characters from many beloved stamp brands made for cards. If the perportions are correct, its game on!
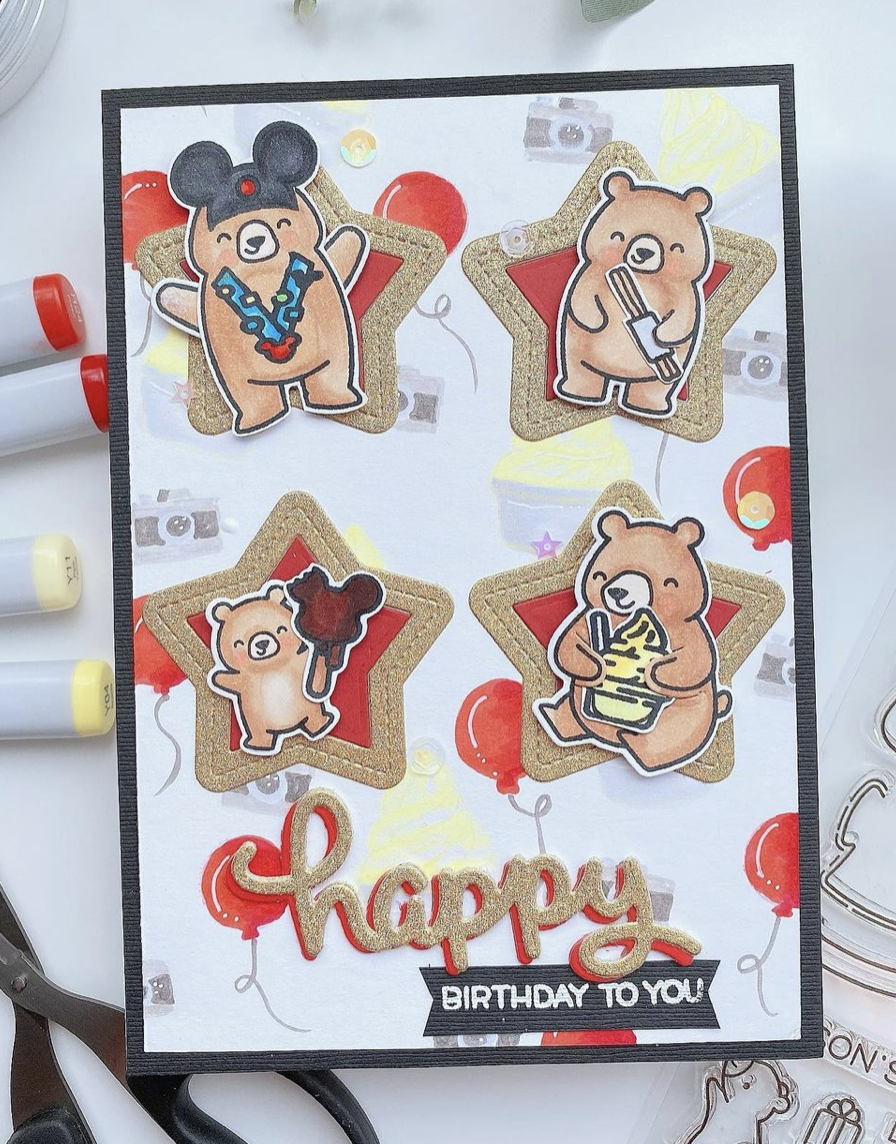
Like a game of paper dolls, dressing adorable critters have become all the rage. Everyone loves a cute bear frolicking in the forest, but now you can make that cute bear at Disneyland, on Main Street eating a churro!
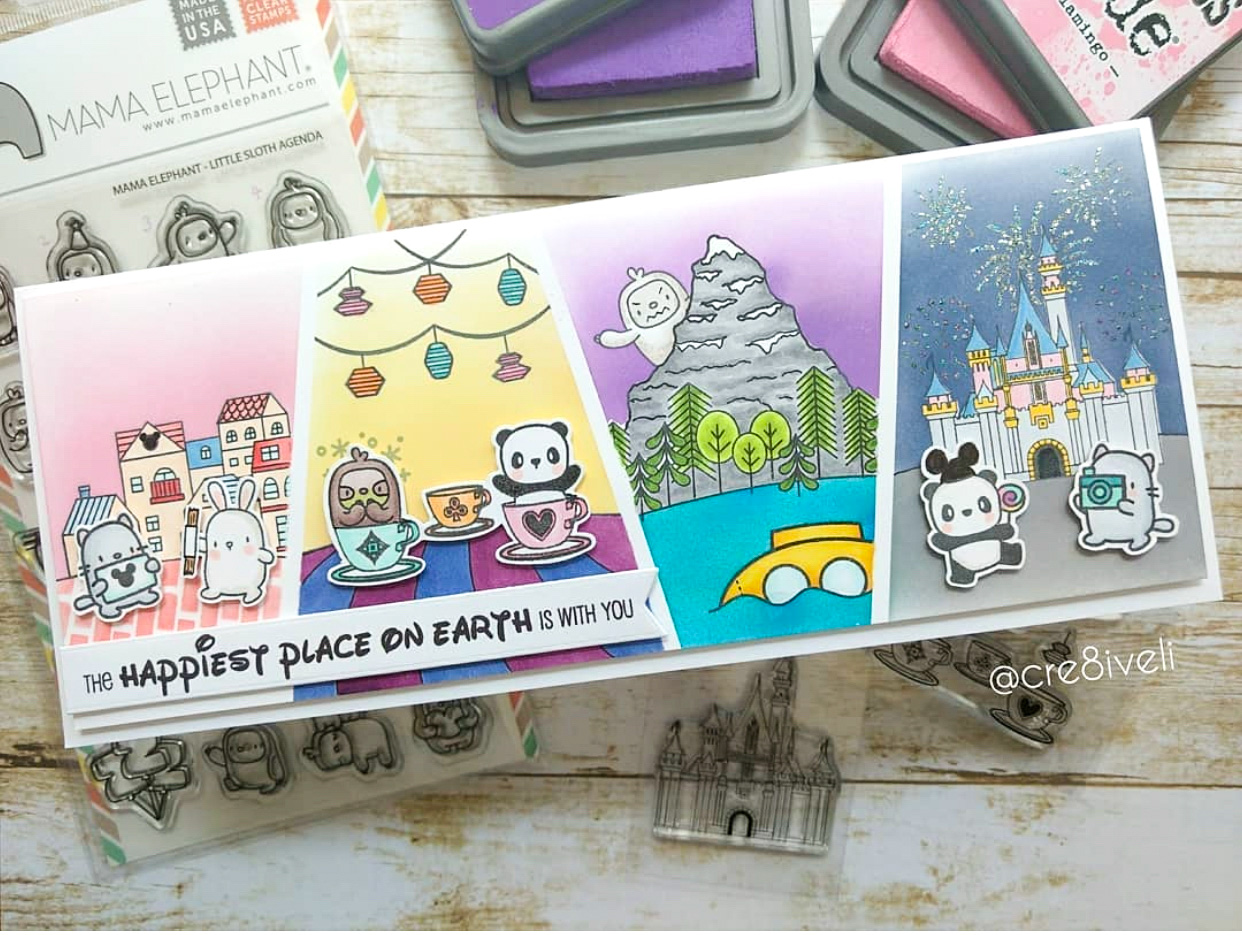
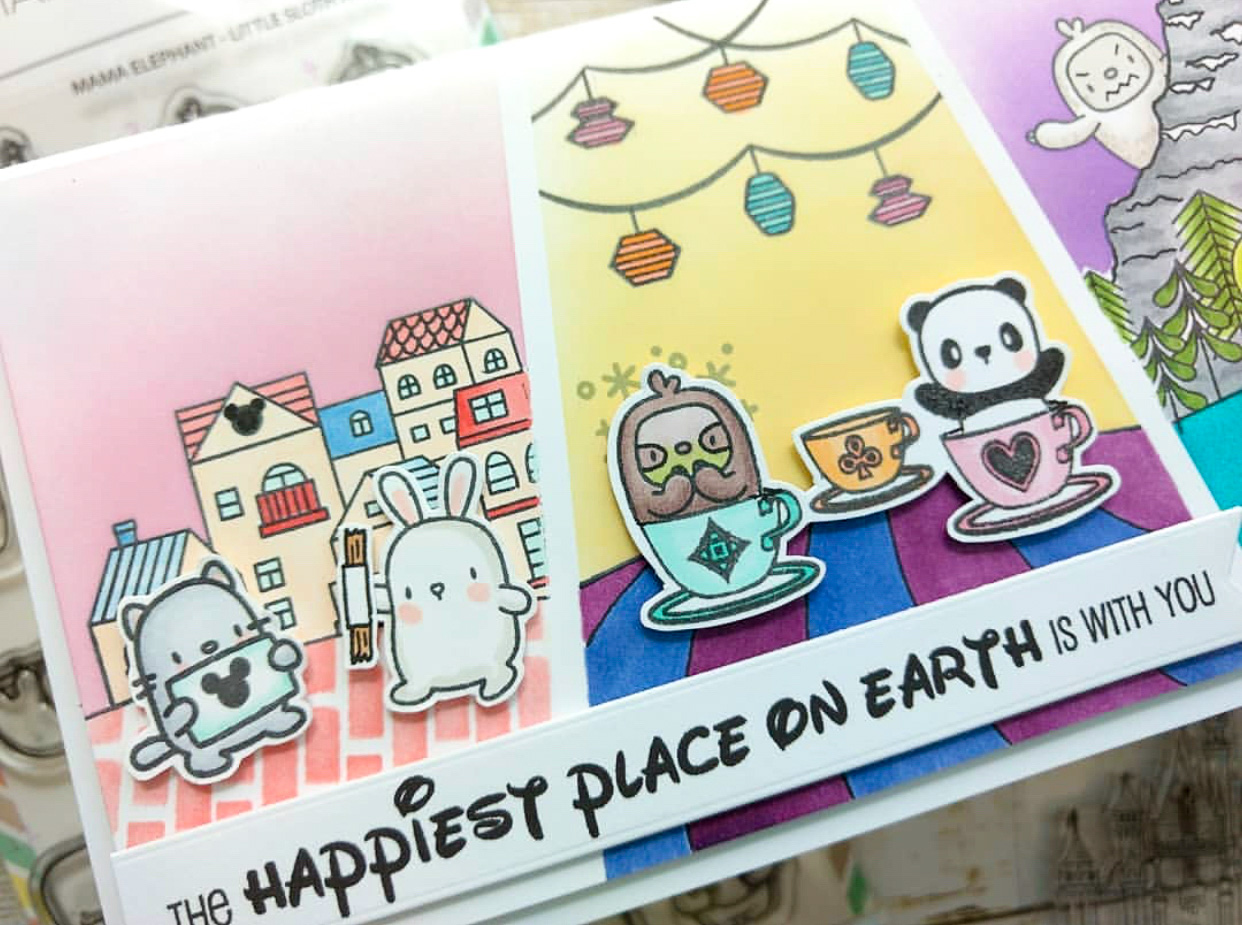
Jenn from @cre8iveli on Instagram created not one, not two, not even three, but four scenes on one slimline card for the next spotlight. Using critter stamps from Mama Elephant and scene stamps from Social Paper Plan she made the perfect theme park day scenic card. Pandas, kitties, sloths, and bunnies are all pretty cute on their own, I think we can agree on that. But place those animals in front of Disney rides and we have taken our love for them to a whole new level. I mean really… a panda and a sloth riding the teacups, just precious!
Long gone are the days of being exclusively brand loyal on one card. Sure, sometimes it just works out that you don’t have to use any other stamps from any other companies to make your card, you have all you need in one stop! On the other hand when you start to combine forces with stamps from everyone to make one masterpiece, it really comes alive! You have then created a unique handmade design like no other.
Thank you to our three card artist who take the time to create these works of art for us, but most importantly thank you for sharing them with us! Your creations have inspired many others as well. Veronica, Mari, and Jenn, you are all creatively brilliant!
Using Instagram to help plan out your trip sounds insane, but it really is a huge help!
Does anyone remember MapQuest? That was the website you went to if you needed directions, it was basically a Thomas Guide. Please tell me I am not alone in knowing what both of these are! You would basically enter the address and it would give you turn by turn directions to where you were going. That meant you needed to know ahead of time where you were going, and the address from where you were coming. You could have just printed a giant map and circled your points of interest, and then carried the map around everywhere. I mean, I was born in the 70’s and we went on a lot of vacations without technology helping us lead the way. Without Yelp telling us where to eat, without travel blogs telling us cool hidden places to explore. It can be done, it’s been done. But to maximize your time and to help you recall all the places you visited on your stay, technology is handy.
Majority of my trips are spur of the moment, if I can find a great deal I cannot pass up, or sometimes I am short on time… flying in and out. For example, Portland is a city where from my location I can find inexpensive flights, it’s also a city close enough where I can fly in early in the morning and take the last flight out back home. This gives me a whole day to explore. If I can maximize my time I have a day full of adventures and eating good.
How do you find all the cool places to eat, or shop, or take the Pinterest worthy pictures at? I get this question asked of me a lot! Instagram! Well, and blogs, and books, and websites, but eventually all these places live with me on Instagram.
I create a bookmark gallery and give each gallery a name. I like to use the name of the city for each bookmark gallery. I sometimes will use a general area, for example I have a Southern California and a Northern California gallery, not a specific city for those areas.
From that point I begin using the search bar on Instagram. Let’s pretend we are searching Portland things to do. Type the word Portland into that search bar. Underneath the search bar they have four options of how to search for what you want. You will see the options: Top, Accounts, Tags, and Places.
>> Top will show you what was searched the most with the word Portland in it.
>> Accounts will be accounts with the word Portland in it.
>> Tags will show you the most used # hashtags with the word Portland.
>> Places will show you a geotag and the name of the place, since we searched Portland it will show us all the geotags with the word Portland. If you click on the location, it will show you the exact pin drop on MAPS. You will see a blue box under this as well that says View Information, if you click that box it will take you to a screen that says Category, Price, and Website. You can enlarge the map, move it out to get a a birds eye view of the surrounding area. It will usually include an address as well. Below this will be posts tagged from this location. If you need more information about the location, click the website and it will take you to that locations official website where you will find all the information you need.
Where to begin? Want to find great food? Look up hashtags like #portlandfoodie, from there all the pictures with that hashtag will come up. They give you a couple options search by the top posts featuring that hashtag or the most recent posts. I do both.
You can also choose to follow that hashtag, that will then allow any post with that hashtag to show up in your daily feed. Scour those pictures for meals that catch your eye! When you find them use the little page flag in the bottom righthand corner of that post to save it to your Portland gallery. Keep doing this until you have a bunch of choices for your trip! Always do more.. more is better! Don’t save only three places because that’s all you have time for on your trip save 23 places! By saving the post you will have the geotag of the establishment under the Instagram account (I made a cool how to info sheet explaining how to do this below). That geotag will be able to open up in maps or it will give you the address of the establishment to give to your Uber driver. Now keep repeating this same method for stores you want to shop at, museums, art galleries, cool landmarks and more until your Portland gallery is full!
Having all the information allows you to seek out your own places to visit not just the ones that, that location is traditionally known for. Eat where the locals eat, shop where the local makers have their wares, listen to the local talent. It is so worth it. I promise. This method of how I find all of that is all here!
Make your galleries and start bookmarking your places. You will have your own travel guide in the palm of your hand. What makes it even sweeter? When I am ready to document my travels I have all the information of where I ate, shopped and adventured to right at my fingertips for reference. I also use a hashtag to help me keep all of my travel posts organized and easy to locate. Once you make travel look effortless, your friends will start asking for your recommendations. By having quick access to your travel posts because you gave them a hashtag will be so helpful in the future. You can have them search your hashtag or find the post and tag them in it.
I have galleries for places I want to visit one day too. When someone ask me hey.. have you been here? Where should I eat. I tag them in a post from my gallery, I tell them I have not yet eaten there yet but to let me know how it is! Always be prepared, you never know when you can hit the road!
Hope these graphics below help you start building your travel galleries on Instagram! If you have any questions please reach out to me! You can also follow along my travels at #tinaktravels and how I document my travels at @socialpaperplan on Instagram.
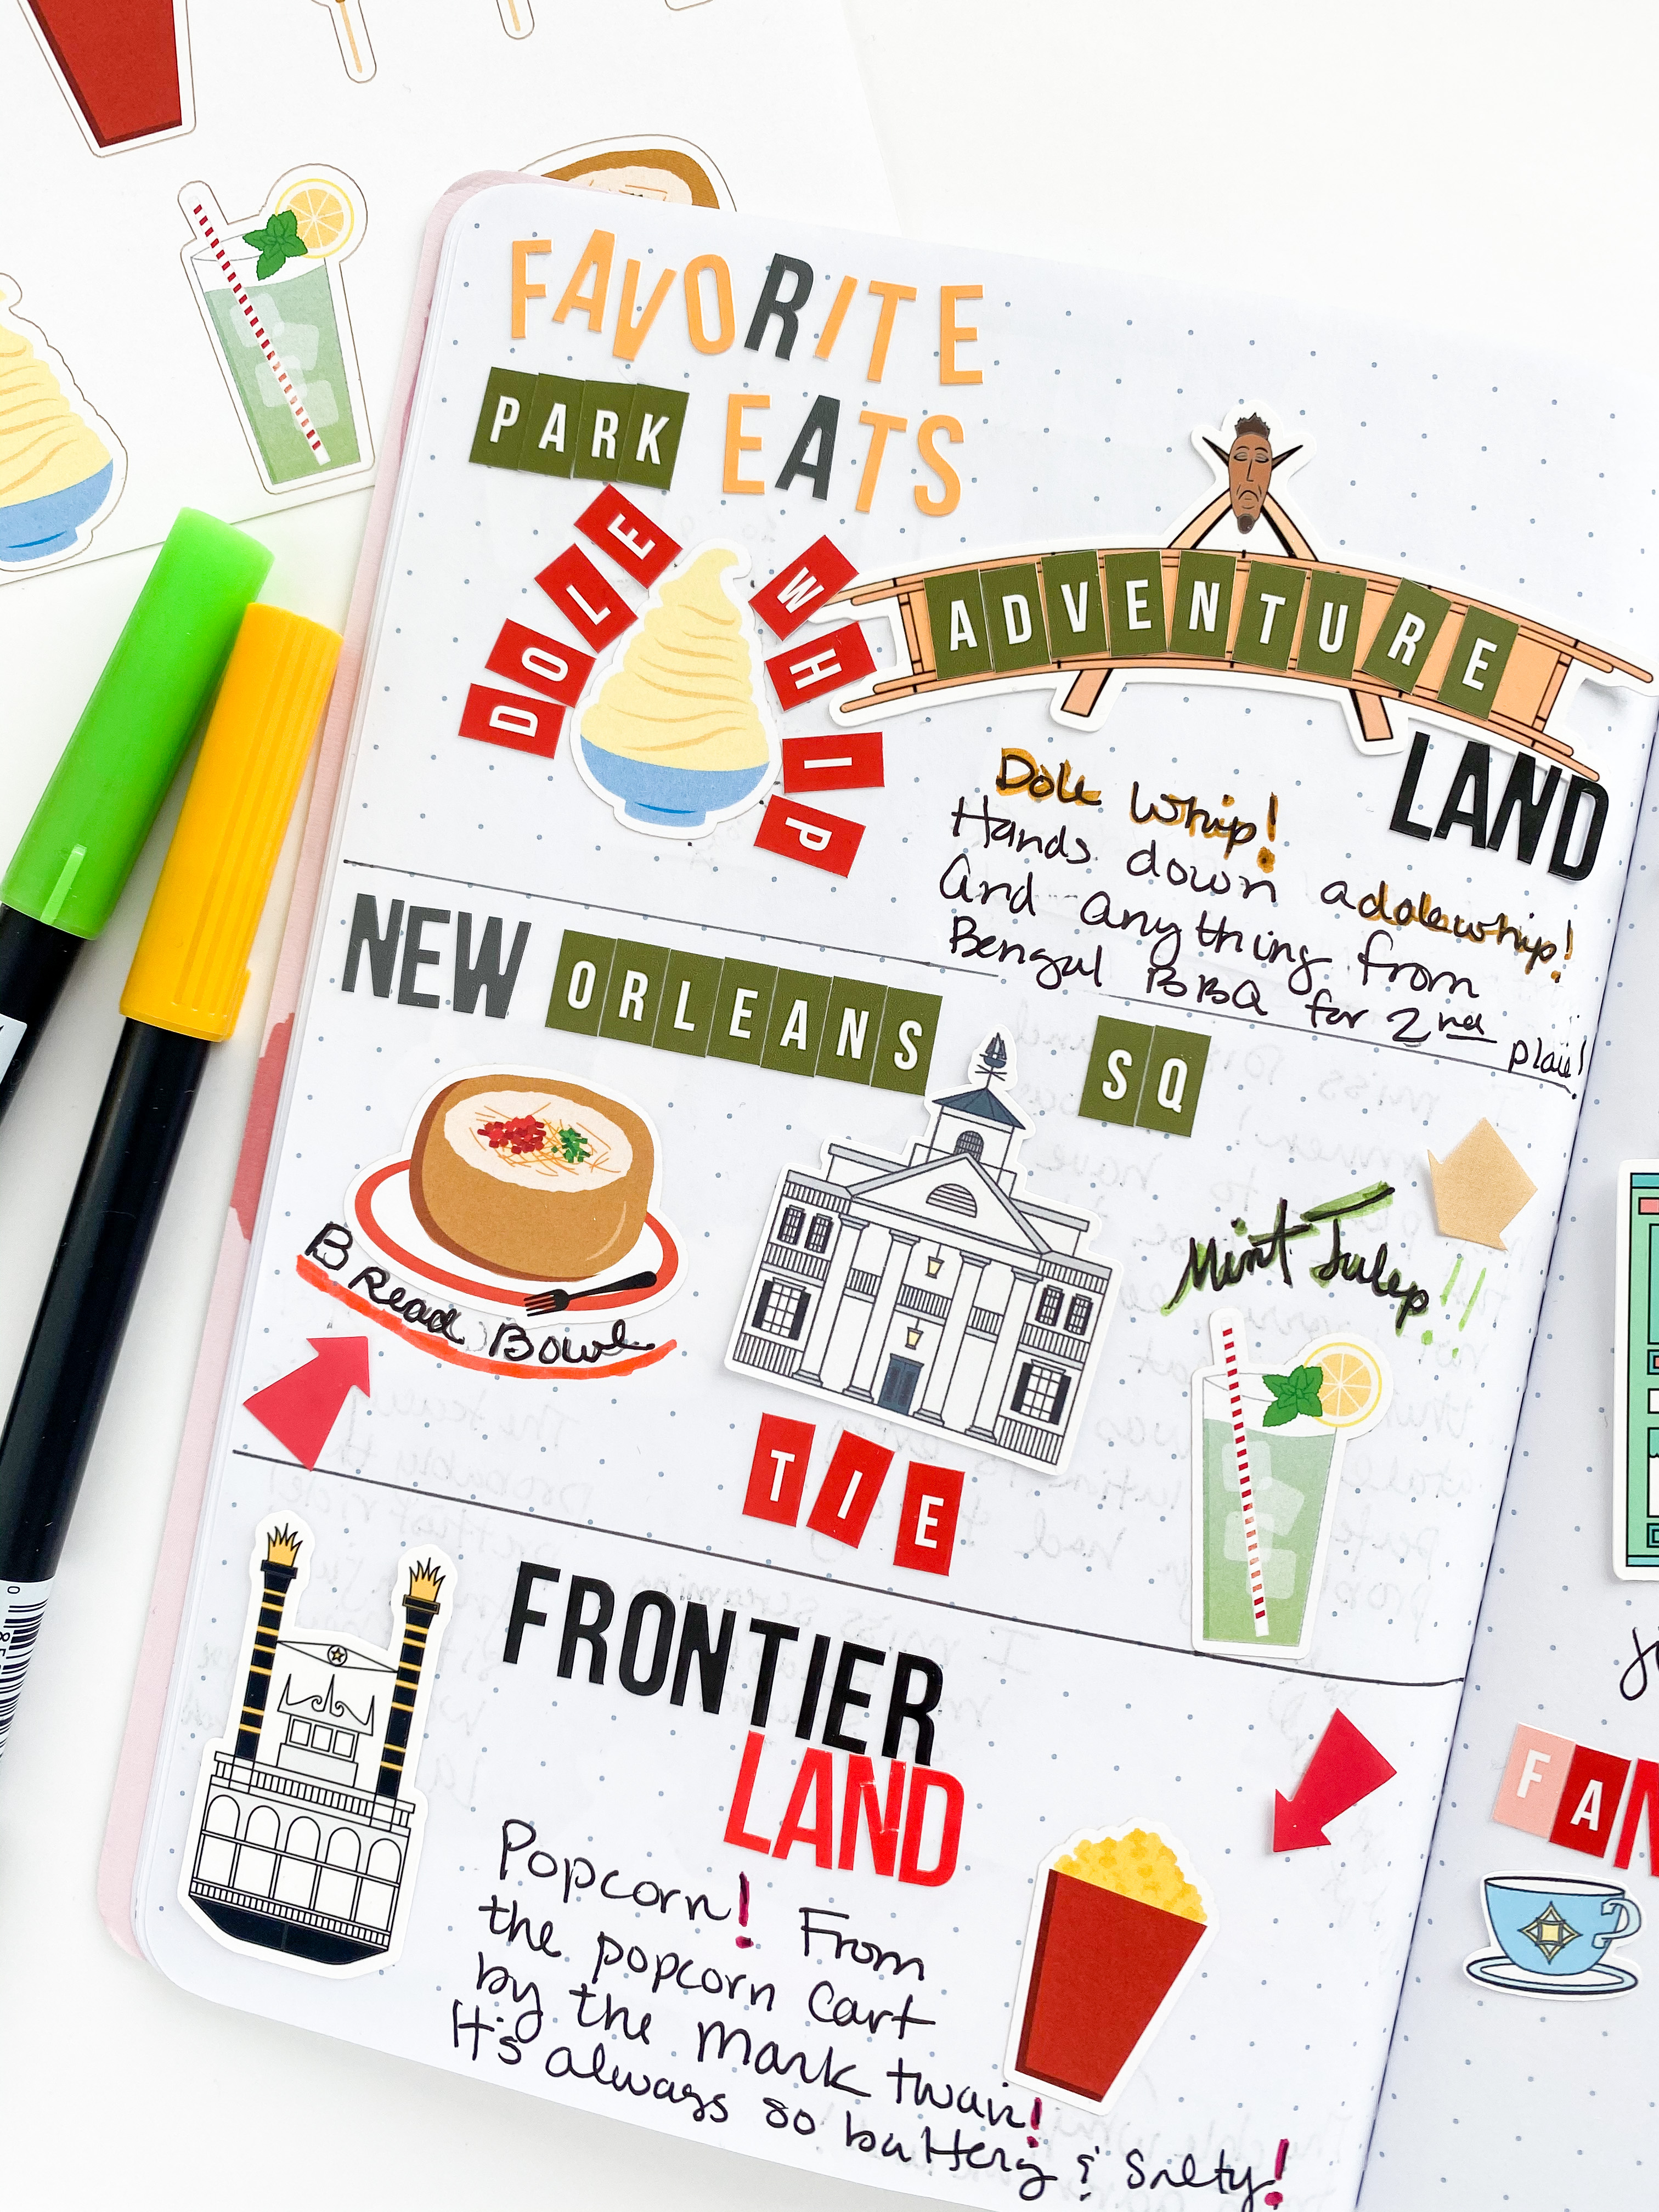
Documenting a Disney World trip doesn’t have to be cheesy; no pun to the mouse himself but, it doesn’t. The items that are traditionally offered to us are red, yellow, black, and white. Can we create magic with for all four parks using only those colors? Why this color scheme? Because they are taken from Mickey and Minnie Mouse’s attire, and has somehow become the unofficial color scheme of all things Disney in the paper crafting world. Can you imagine going to Animal Kingdom and having only that traditional color scheme to use to document all of your amazing pictures with? It would definatley be discouraging to say the least.
I have only been to Disney World twice with children, the other dozen or so times have been adult only trips. I still want to document my trip to the parks, without having to use the child like illustrations that are often made for us to use to memory keep our trips.
Working with a color scheme that compliments the pictures you are documenting will make for a more life like journal. It will make your pictures stand out more, and will tell the story best.
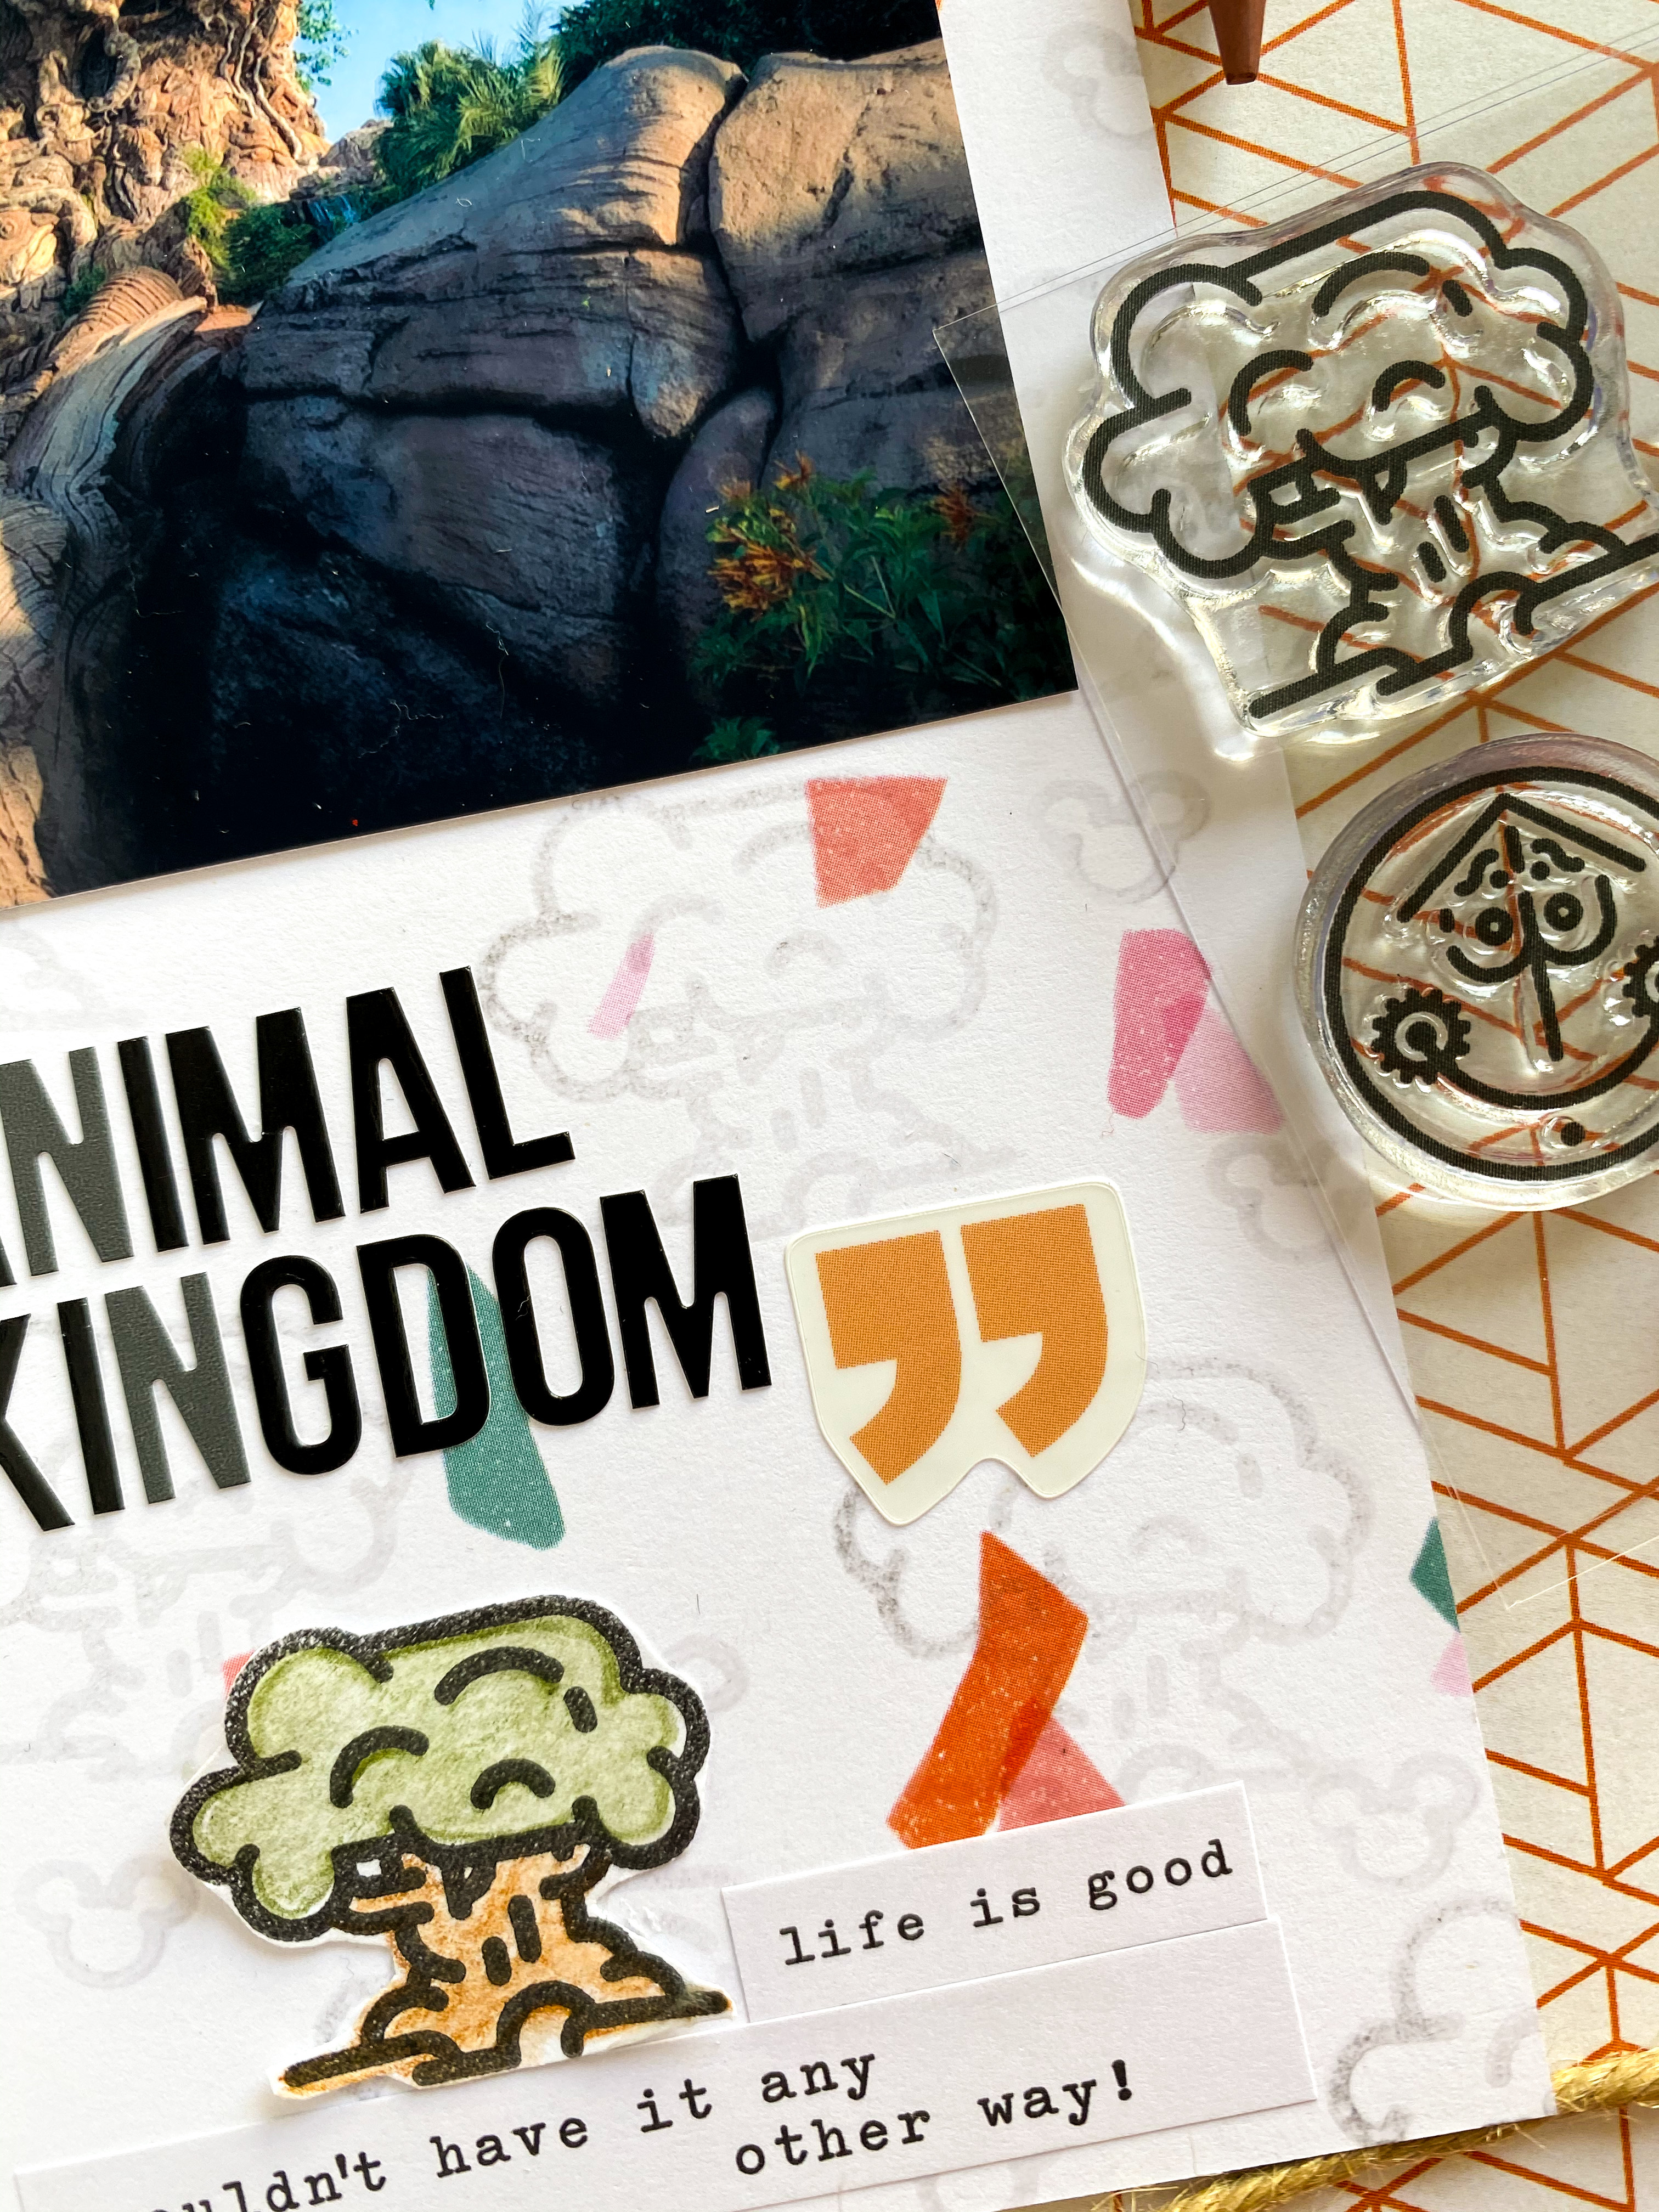
For this Animal Kingdom page I did in my travelers journal, I used colors that complimented the park as a whole. Natural colors are used throughout the parks design. The buildings blend into the background as the animals and foliage are the main stars. Browns, all shades of green, terra cotta, and stone are a great combo to the blue sky. I pulled from that color palette for this layout.
As it stands in the park, I too wanted the Tree of Life to be the focal point and stand out. I could have stamped the tree stamp in a bold color or black ink, but I wanted a more subtle look to compliment the picture not over shadow it. I stamped it in a watermark ink to achieve this look.
VersMark Watermark Ink
The VersaMark watermark ink will allow whatever you are stamping to be one shade darker than the paper color you are stamping it on. In essence this one pad can actually be 100’s of different colors all in itself! In the above example I stamped the tree stamp with it and then onto our stone colored paper, it in turn made the stamped image one shade darker then the paper resulting in a darker stone color almost grey color tree. I used it to make a background pattern for the layout.
I wanted to draw your eye to the bottom of the page where I stamped a tree in black ink and colored it in with watercolored pencils. I could have used markers but I wanted a more natural look, a more subtle color scheme. Watercolor pencils are perfect to achieve this look. I outlined the tree, and then used my water brush to move the color throughout the tree, resulting in a very life like depiction of the tree. Markers in my opinion would have been almost too perfect and would have been a little too bold for my liking. The colored pencils are less forgiving allowing for imperfections to stand out. Just like in nature one tree can look like a million different shades of green depending on the angle you are looking at it from. I used the watercolor pencils from Fun Stampers Journey. The water color brush pen is a refillable pen with a brush like tip, allowing you to move the color from the pencils around your image. I used stamps from our line at Social Paper Plan.
Watercolor Pencils Fun Stampers Journey Water Color Brush PenStamps from Social Paper Plan
Disney’s Hollywood Studios is a whole different color palette. You have more colors brought in to the making of that park. You have the eye-catching storefront buildings used to mimic California, you have the bright colors of Toy Story Land, and the futuristic colors from Galaxy’s Edge all in one park. Even the food is brighter here!
It is envetiable that Florida is going to be hot when you go.. that’s one of the best things about Florida! Cold drinks, foods, and desserts are to be celebrated there! I am going to show you two layouts that are most contrasting in design but are taken mere inches from one another.
Social Paper Plan TN Layout
In the above layout bright colors are welcomed in hopes you feel the excitement of a nice cold drink on a warm spring day! Even though the infamous Hollywood Tower of Terror is in the picture, it is merely a costar to the actual star of the picture.. the spiked frozen drink! That drink is the main attraction of this layout, that is what I wanted you to remember from this design. When framing this picture I could have gotten extremely close up and focused on the drink.. but I wanted to set the Tower of Terror in the background so we look at this layout we can picture ourself right back in that same spot sipping on a cold drink in Hollywood Studios.
Instead of using red as a supporting color I chose to use yellow as a highlight to the main star of the picture… the cold drink! I used the VersaMark watermark ink stamp to stamp a background pattern on the blue paper. Same ink different paper, and look at the difference. It made a dark blue image. I stamped the frozen ice cream image in yellow ink and colored it in with a yellow waterbed marker because I wanted a bold look. Used a Tombow water based brush pen similar to the one pictured below. They do have a blender pen available to soften the colors and blend almost pencil or paint like. You can purchase these pens individually or in sets.
Tombow Dual Brush Pens Stamps from Social Paper Plan
This picture of the Hollywood Tower of Terror was taken maybe a foot to the left from the above picture! I took a Twilight-esque approach to this layout since the whole concept of this ride is developed from the Twilight Zone series. If you are older like I am, Twilight Zone was watched regularly at home.. can you recall the opening sequence when items are almost floating around in blackness? Same concept as these hotel and Mickey silhouettes are floating around on the paper. I stamped these images in a black ink and used the Tombow markers to color them in. I used two shades and the blender pen to mimic the outside of the hotel. Stamp set form Social Paper Plan
Stamp Set from Social Paper PlanSocial Paper Plan TN Layout
Now if we were at Disney World, Galaxy’s Edge would be at Hollywood Studios, but this particular picture was taken at the Disneyland Galaxy’s Edge. The futuristic colors of metal, carved stone and steel are used throughout this land. No bright colors at all, no balloons, no Disney logos on the cups, or food, or anything to remind you that you are at a Disney theme park. You are literally transformed when you enter this land to Batu! For this layout, you guessed it… I used the VersaMark watermark ink pad! I stamped it on this sage green paper and it gave me the most perfect shade of darker green to work with. For the stamped images I colored them in and fussy cut them out. I used the same watercolored pencils as in the Animal Kingdom layout except I did not use the water to activate the colors, I left them as is.
Stamps from Social Paper Plan
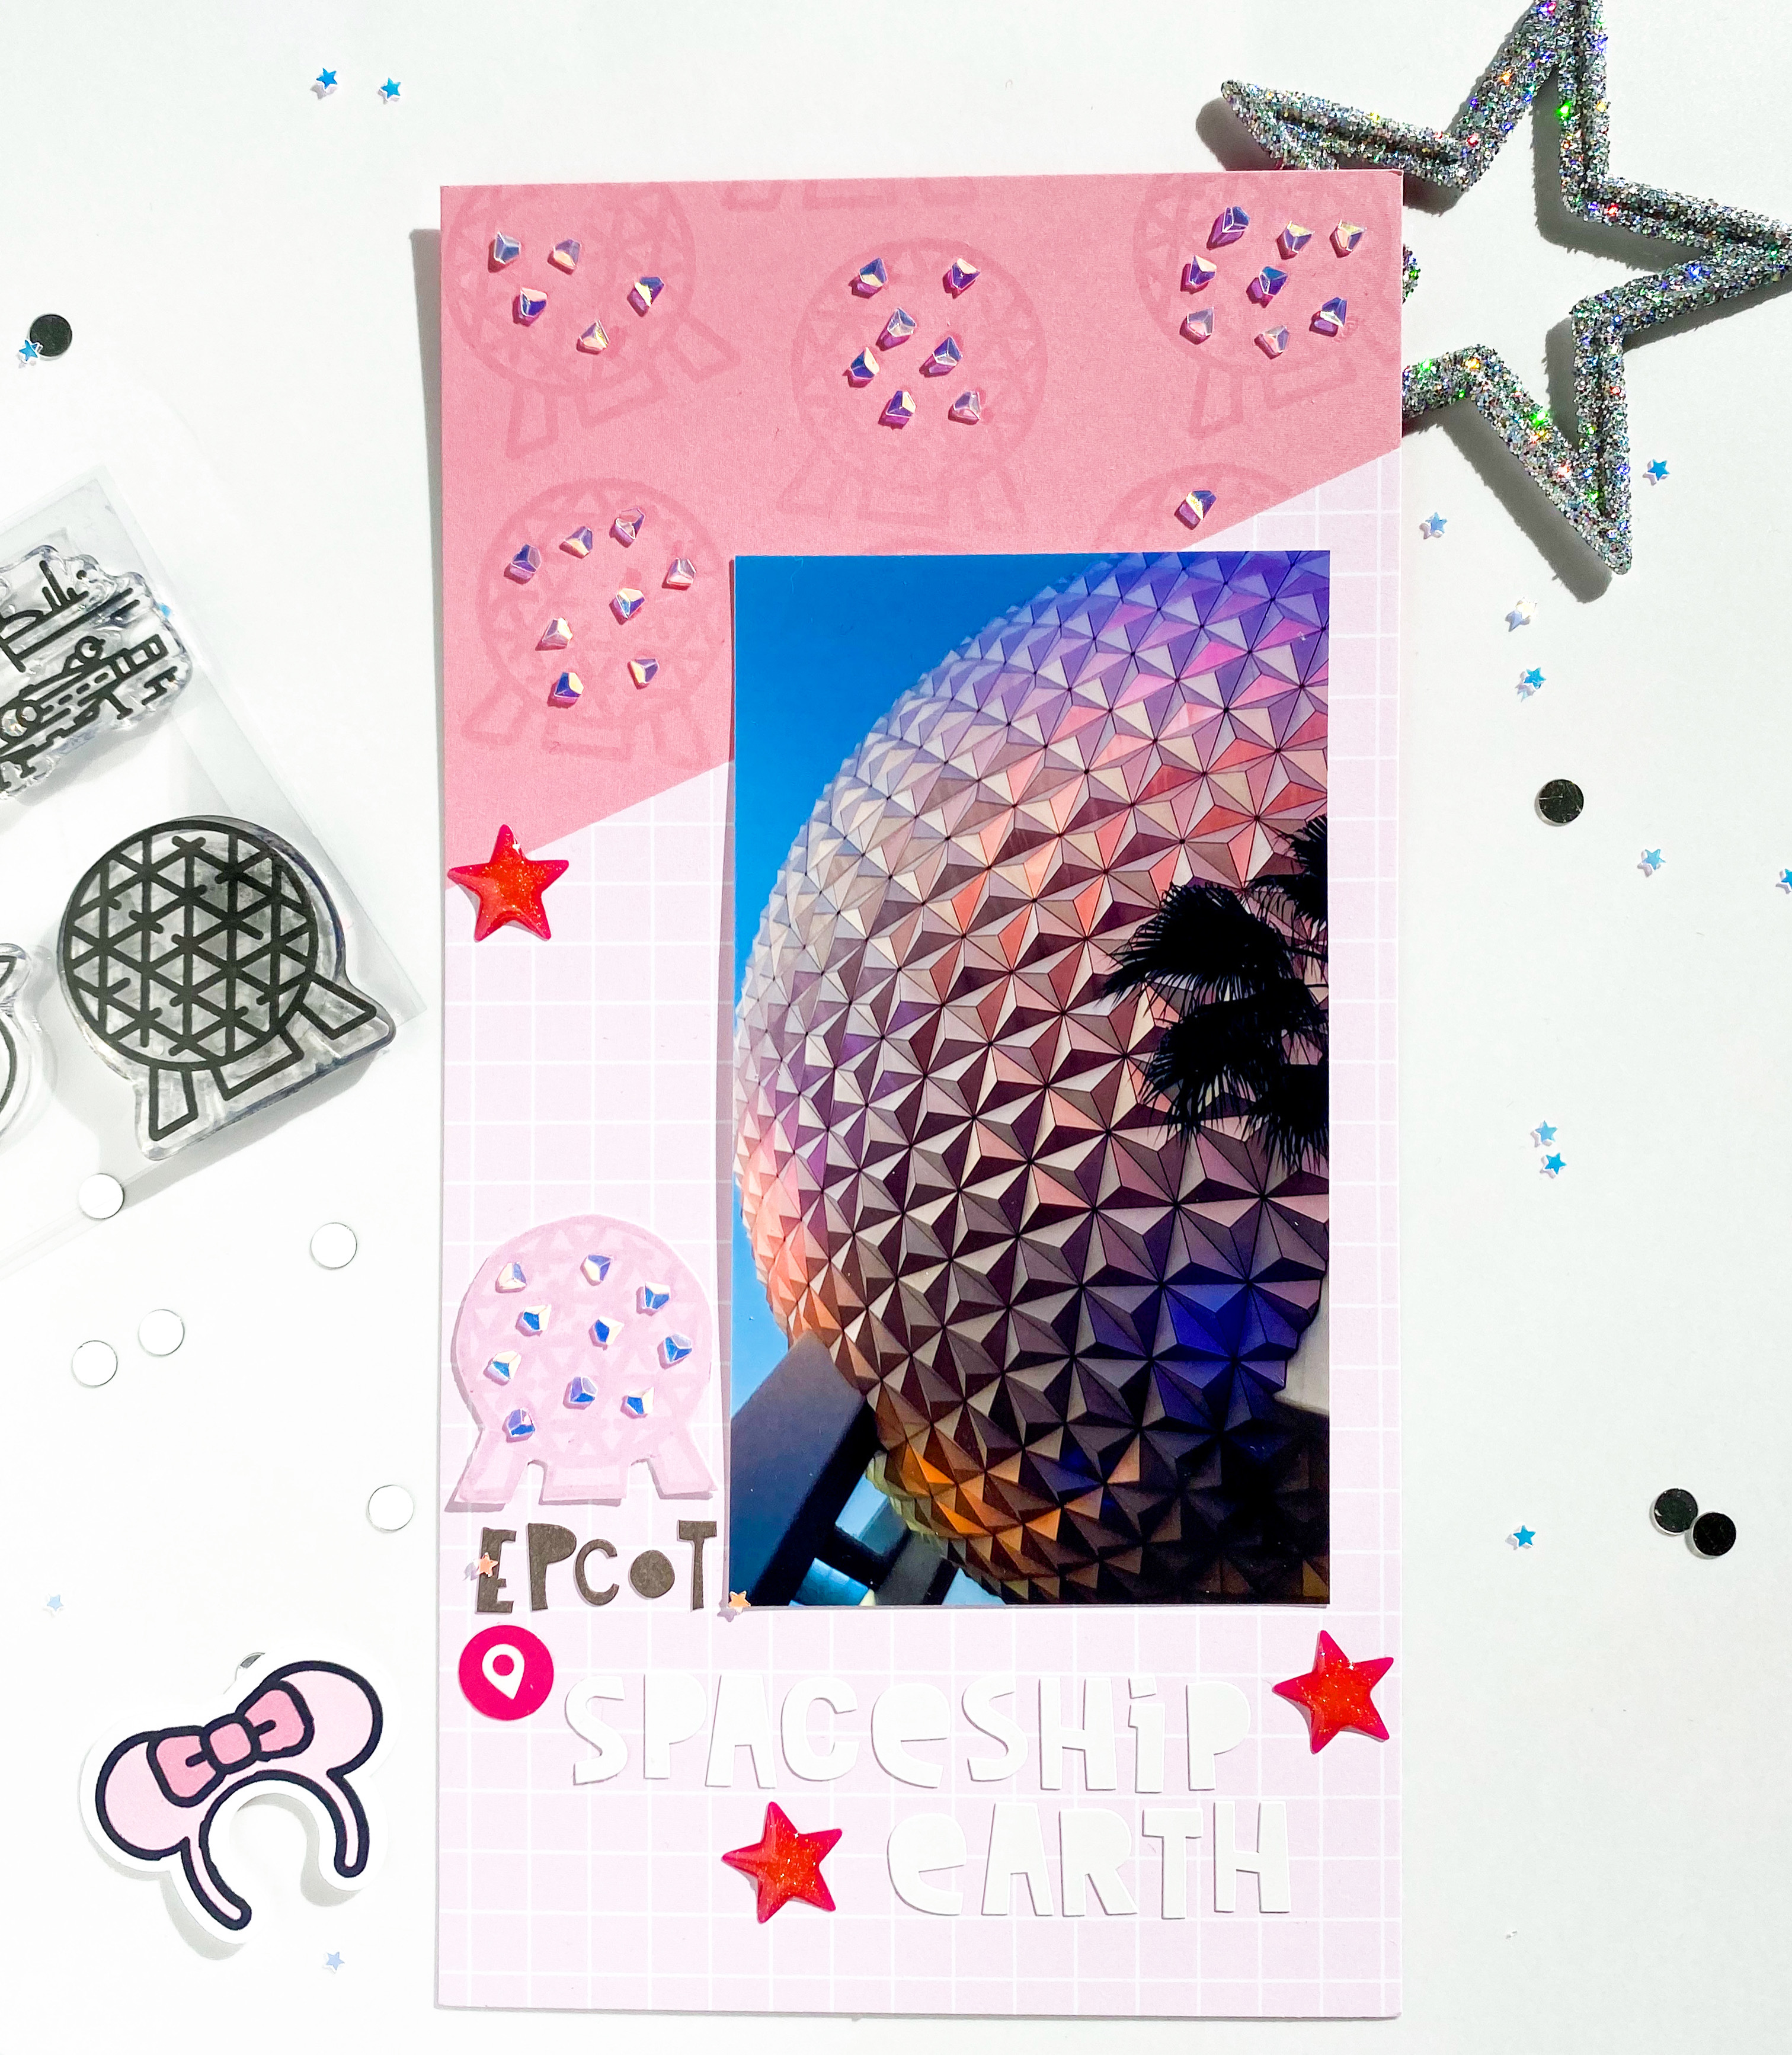
If you have ever been to Epcot you know the big golf ball in front know as Spaceship Earth is the icon of the whole park! It is the first thing you see when you enter, and the last thing you see when you exit the park. The big golf ball on any given day can look blue, grey, purple, pink, depending on what time of day it is and what kind of sunset Florida gives you. On this evening I was fortunate enough to get a beautiful pink sunset! I used that wonderful VersaMark watercolor ink pad on this layout to stamp the round sphere on pink paper and it gave me a darker pink to work with. I could not resist adding a few iridescent embellishment to compliment the perfect beams of light shining on Spaceship Earth.
I hope this helps you create out of the box layouts when documenting your Disney trips. That one ink pad yielded how many different colors for me? Yep! It is a must have in your craft arsenal. Now do not get me wrong, I do use those traditional Disney colors when I need too! For more ideas please follow along on Instagram @socialpaperplan. I have tagged all of the products I used in hopes it helps you find everything easier.
Have you chosen a new journal for the year yet? It can be any journal, notebook, or set of papers you have. If journaling is something new to you, start off with something simple, something that you may already have on hand, until you find out what you need your journal to do.
If you want to be more creative in your journal you will want something that can withstand more mediums. Will you be using ink, glue, markers? All of these should be taken under consideration. Can your paper withstand the ink bleed throughs? Will the following pages have shadowing? Sometimes the paper will be able to hold the ink so it does not bleed through to the opposite side of the paper.
Next, I would decide what you will be using your journal for? Daily brain dump, creative outlet, emotional therapy, daily documentation? Knowing how you want your journal to serve you will help you in the set up of your journal. You can always change the use of your journal, you will soon discover better ways your journal can serve you.
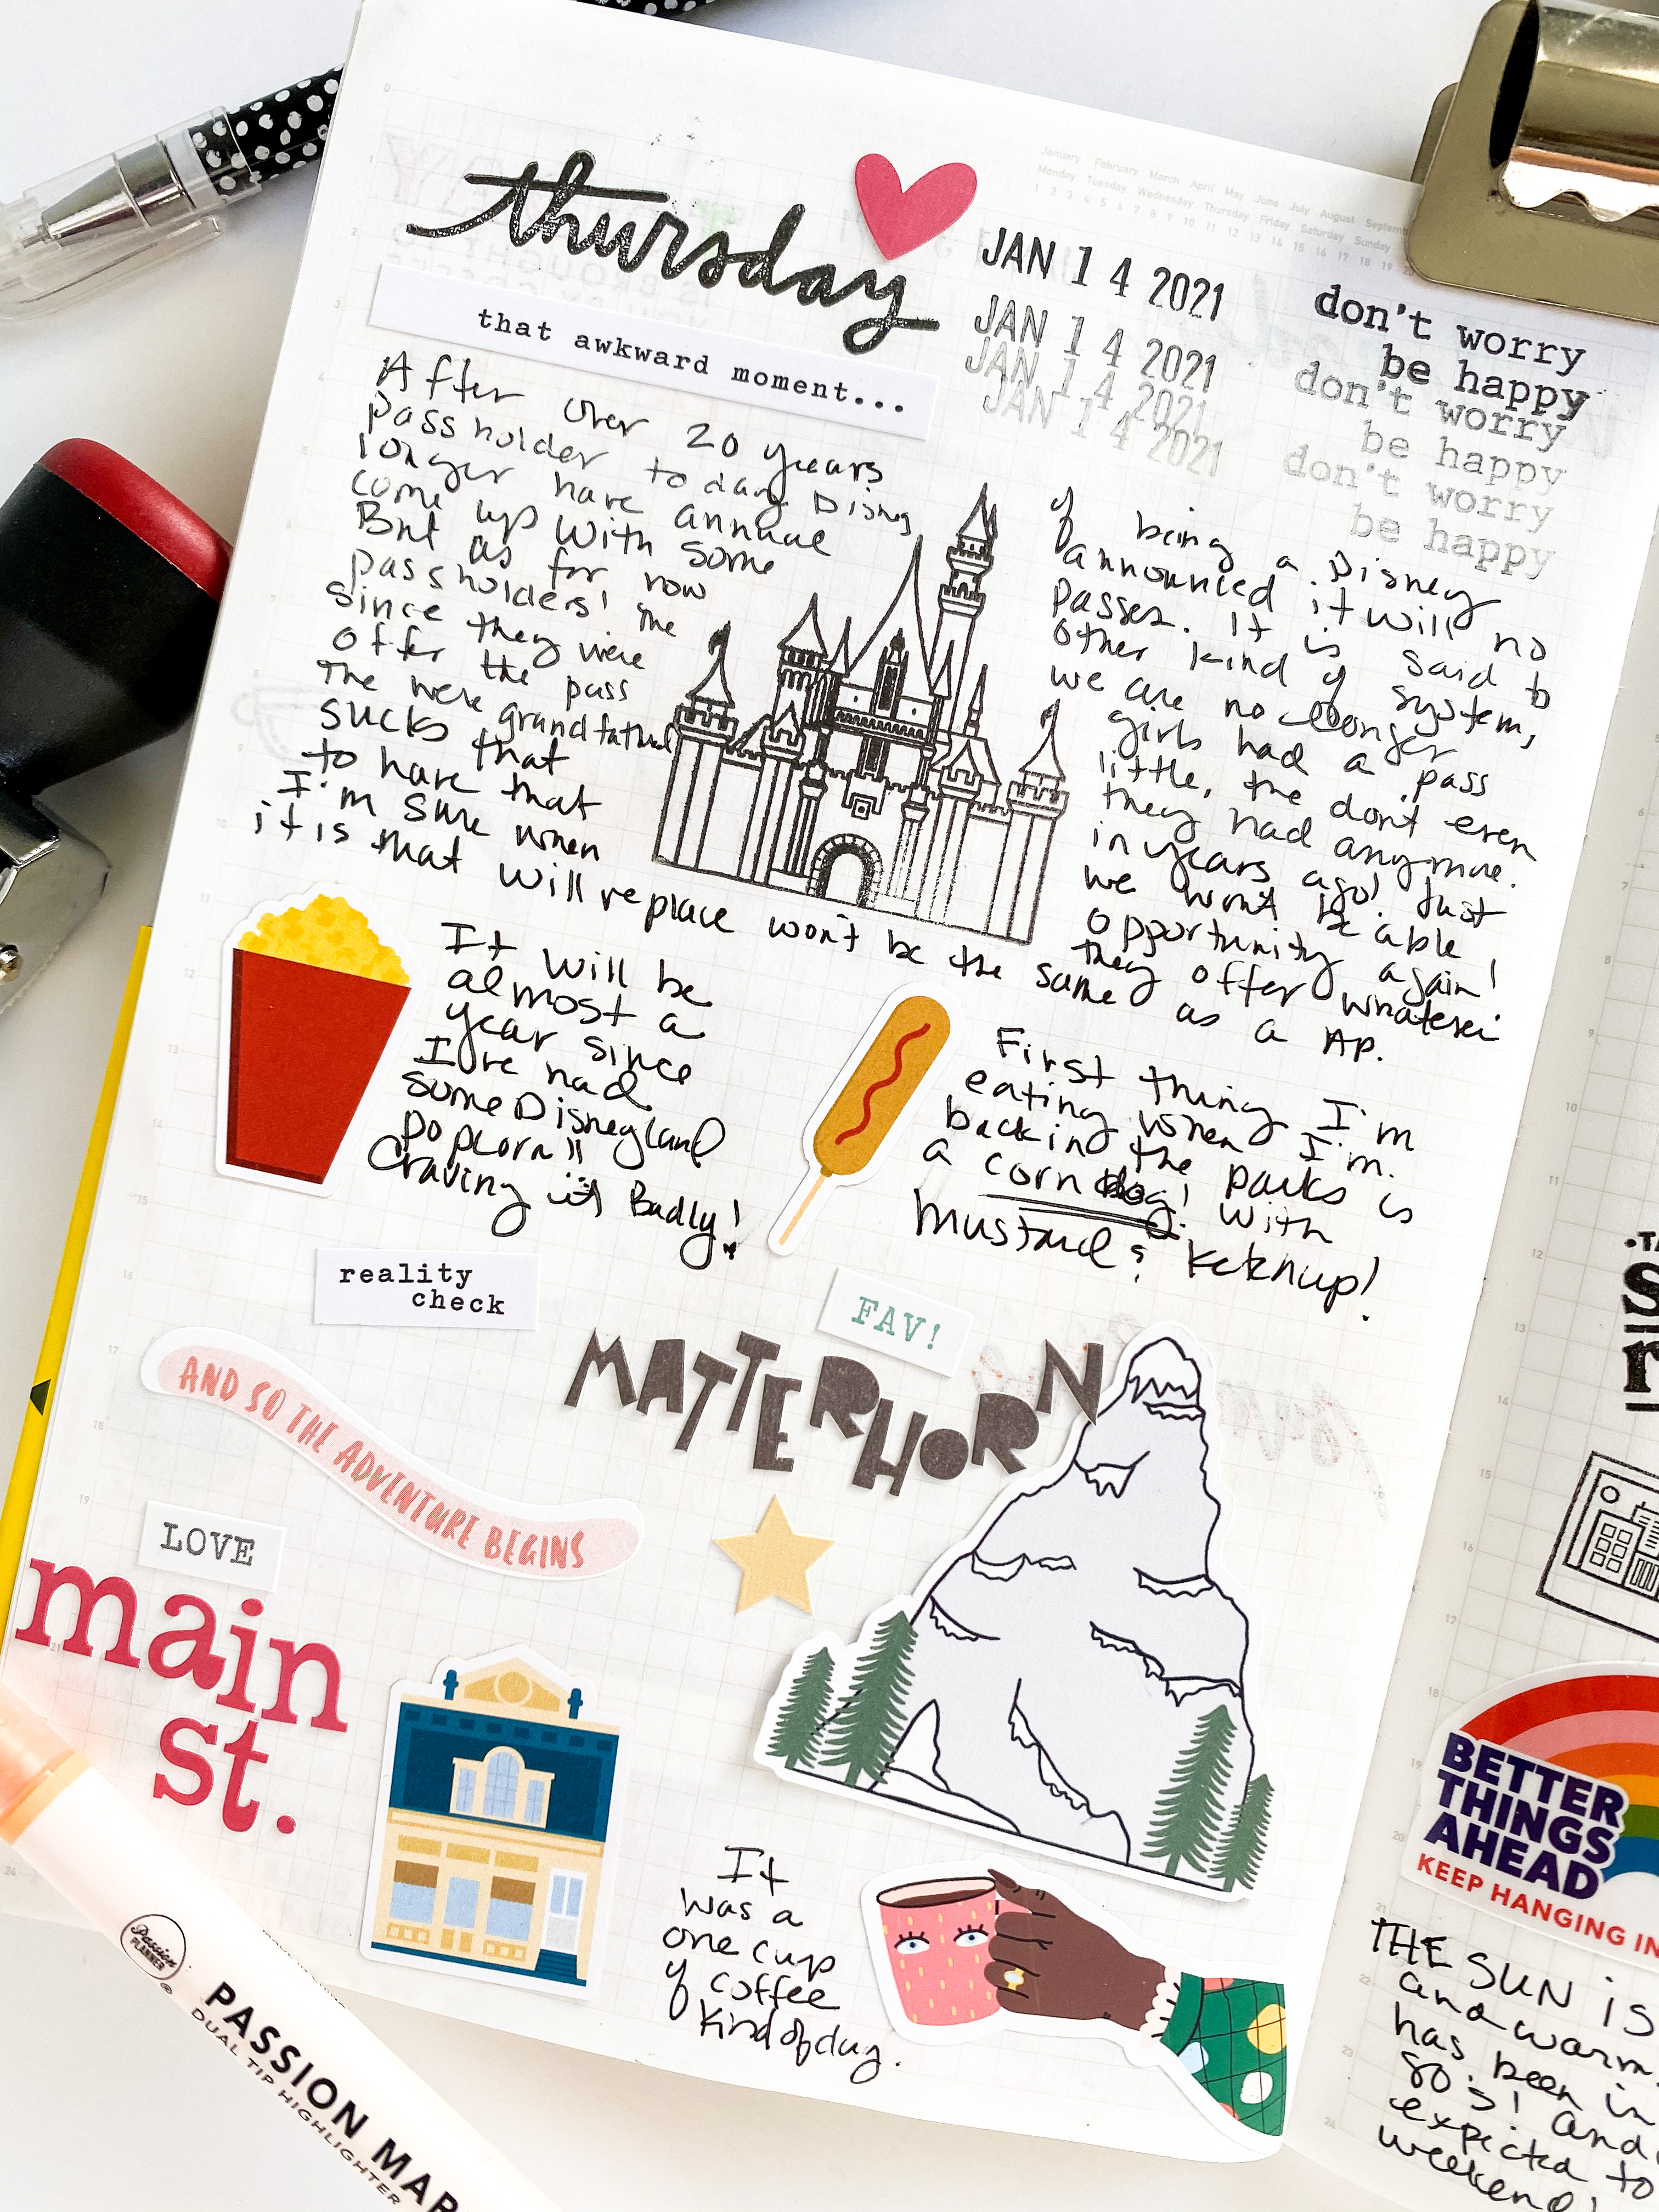
The best thing about having a journal is that you don’t have to follow any rules! Some days I choose to just write down my thoughts for the day, and other days I choose to use stickers, stamps, inks, markers, and my favorite… COLOR!! Color always translates my mood best. I can instantly look at the colors I used for that day and interpret what I was feeling or what I wanted to convey journalling.
Some days might not have much to document, or you might not have much to say, those days exist. I still log in a journal entry. You can doodle, stamp an image and color it in, add some stickers, and call it a day. The beauty of a creative journal unlike a handmade card, or memory keeping layout is the page does not have to match. Most likely on a scrapbook page, or planner page they are unwritten rules that people tend to follow. Do the colors compliment each other? Are the proportions correct? Does it look aesthetically pleasing? All of these are considered. When journaling its more freeing of those unwritten rules. You can see a journal entry with colors that clash, mediums that would not normally go together, in spaces that are not common and its perfect!
The stickers don’t have to coordinate, the ink does not have to match, the lines don’t have to meet. Once you free yourself from the rules, journaling will become effortless. You will notice it more as a therapy session when creating your entry for the day. Of course, if matching colors are you, or if you cannot write unless it’s straight, you do you! You make your own rules in your journal. Your journal is there to help you destress, live more freeing, abandon all rules, and help you clear your mind.
I hope you find your reason to begin a journal. I will be listing some of my favorite items to help you get started on your journal journey.
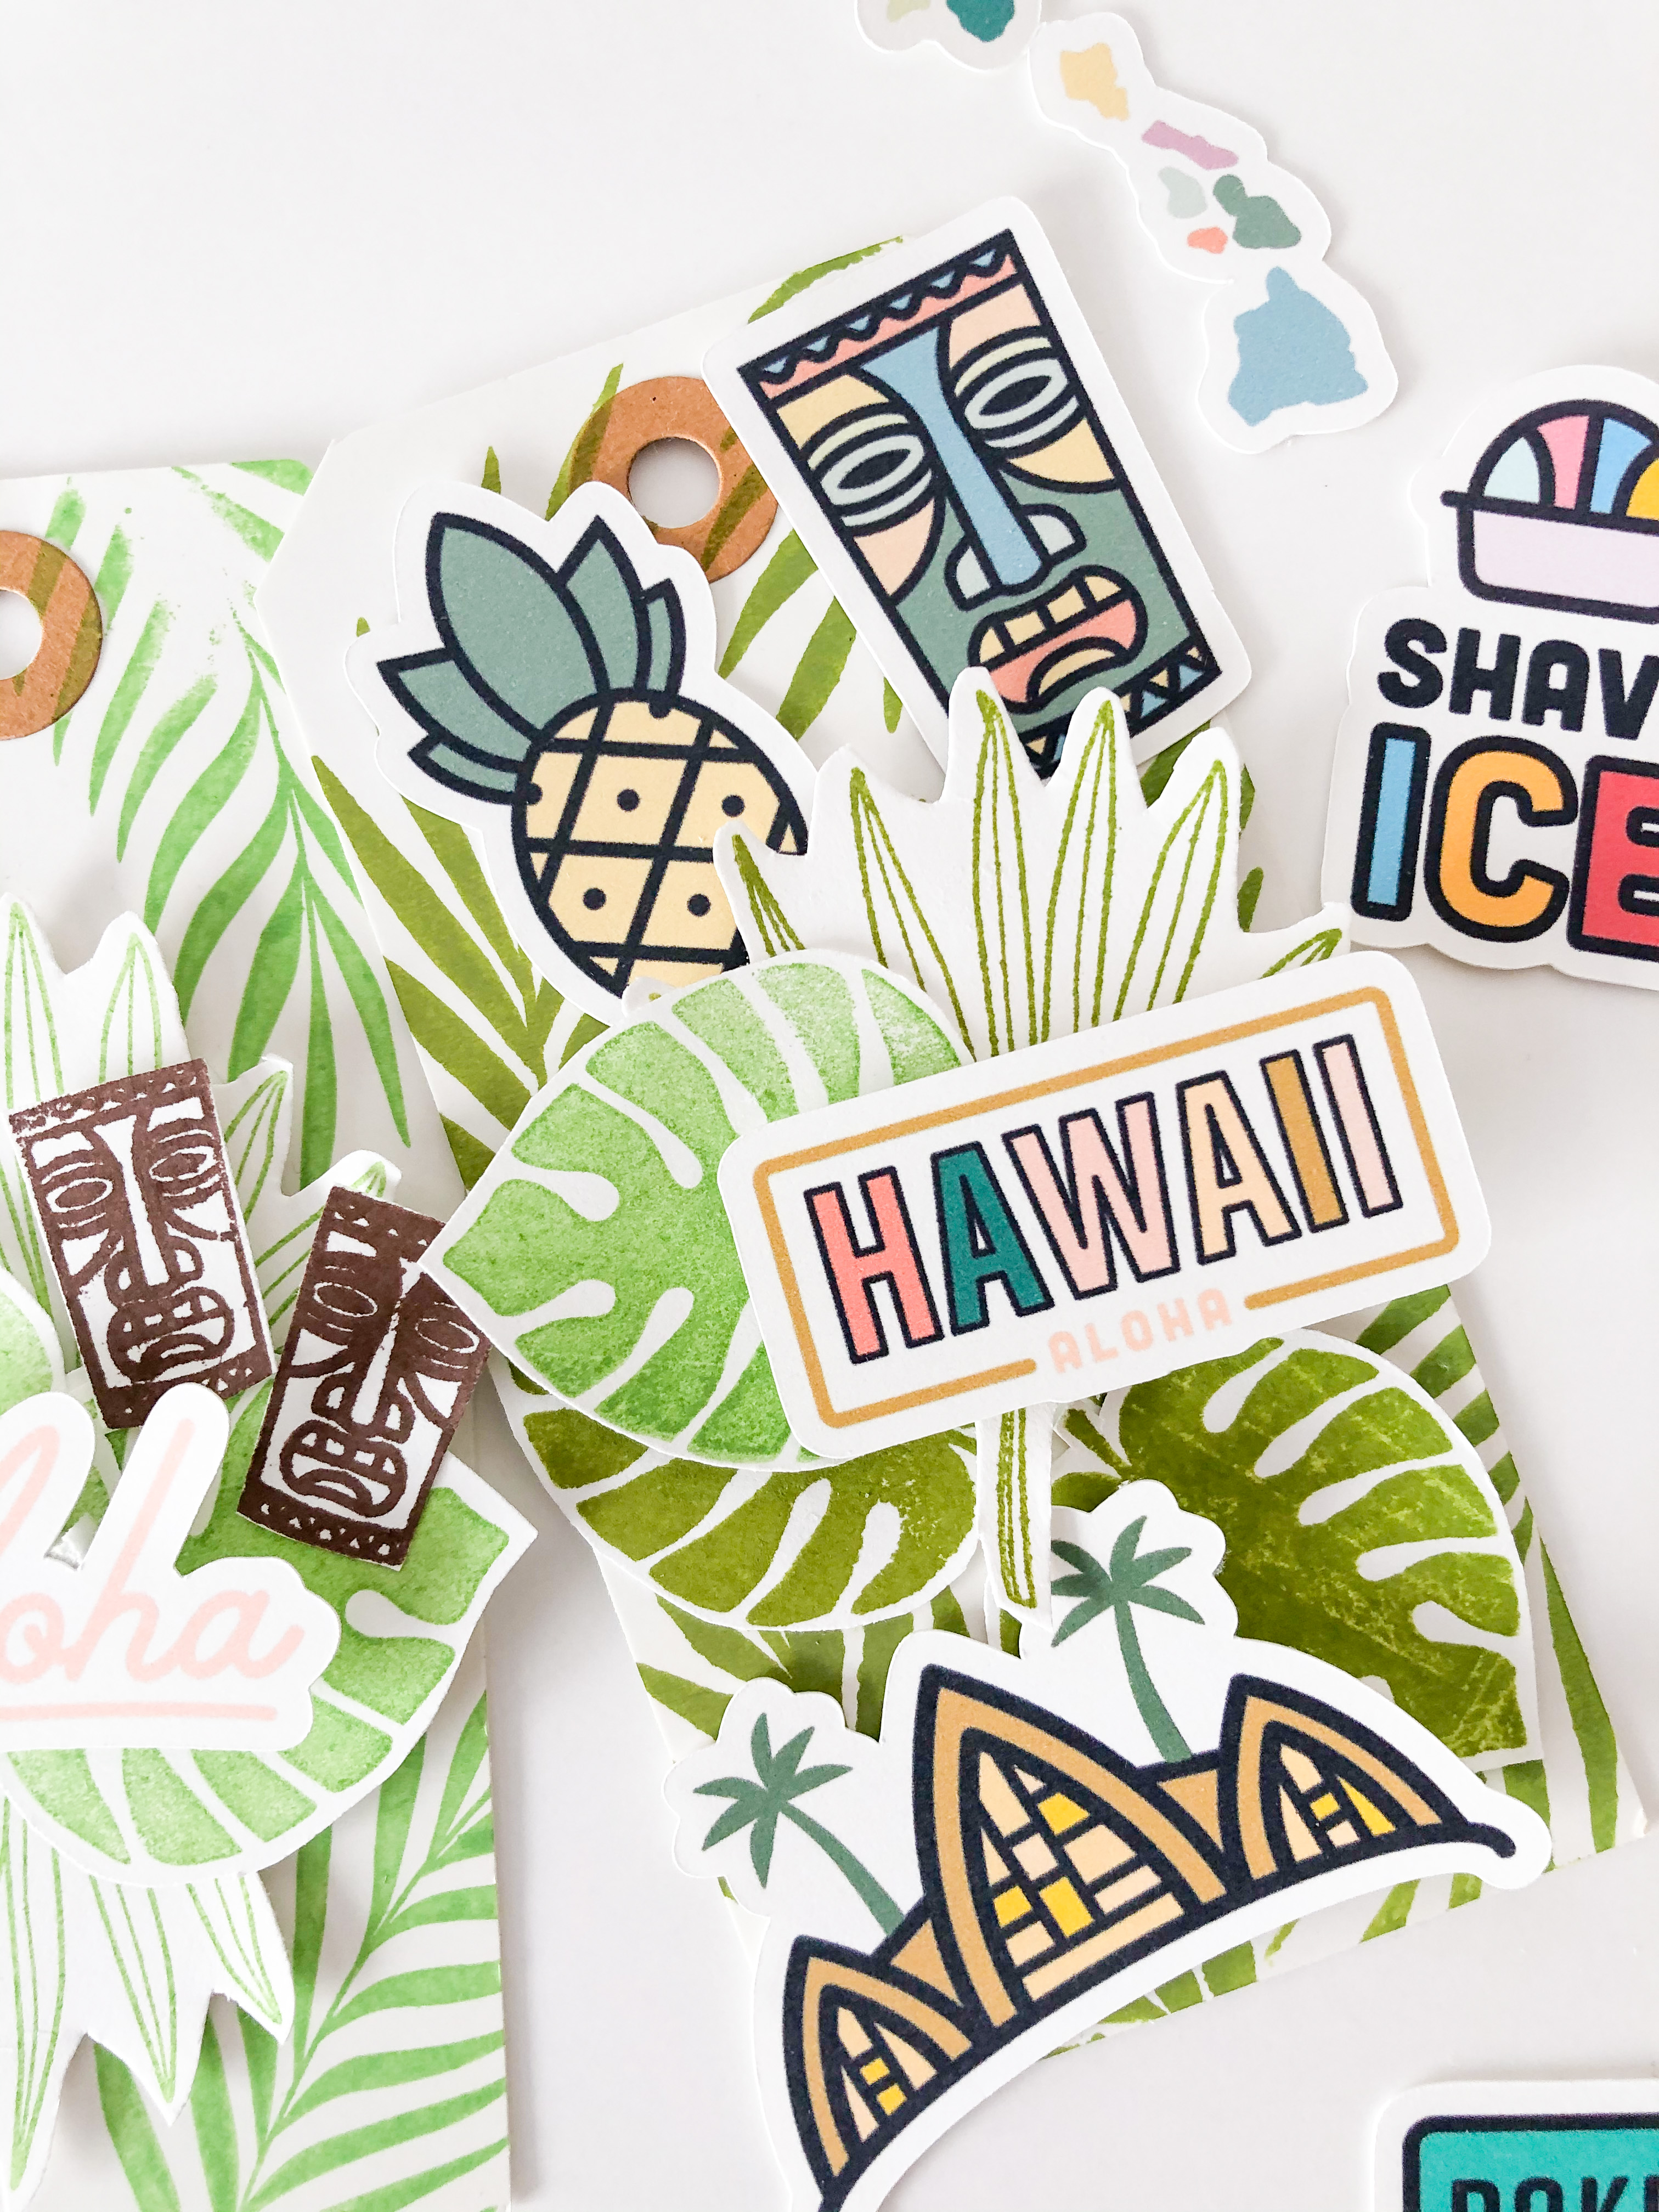
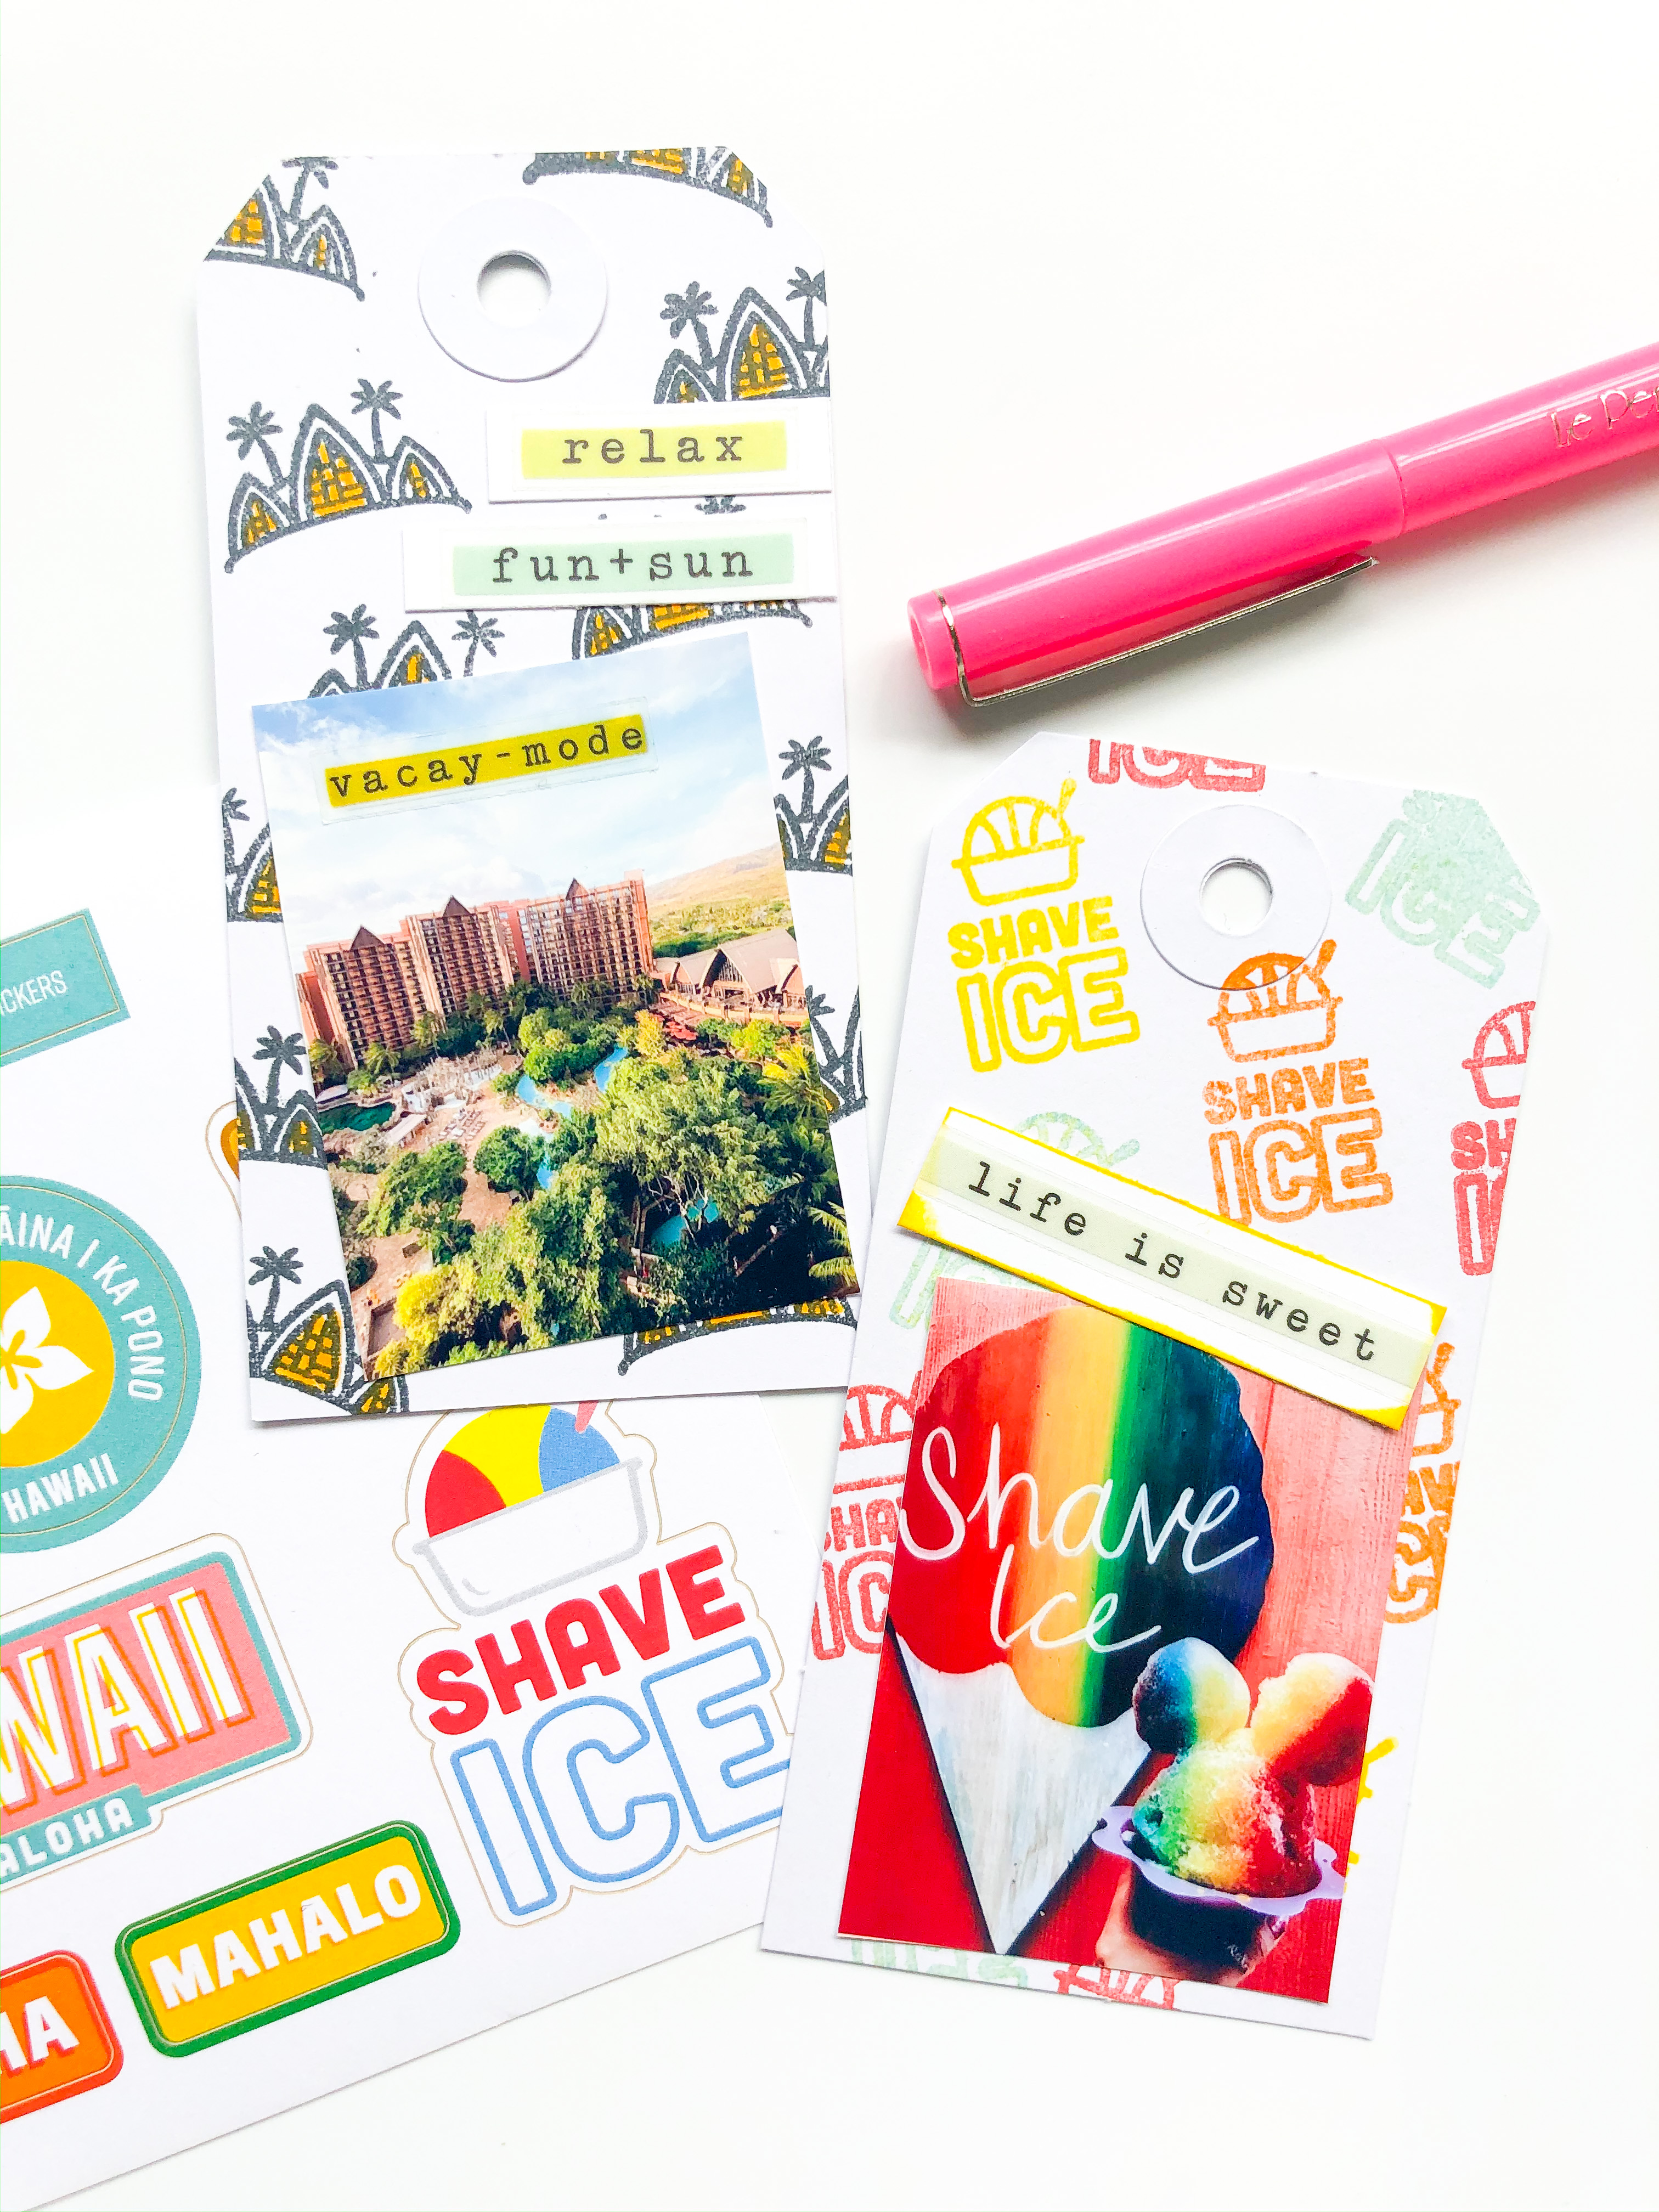
Who isn’t missing the Hawaiian Islands right about now? I am! The next best thing to being on the beach sipping a tropical drink with my toes in the sand is creating with some island themed paper goods!
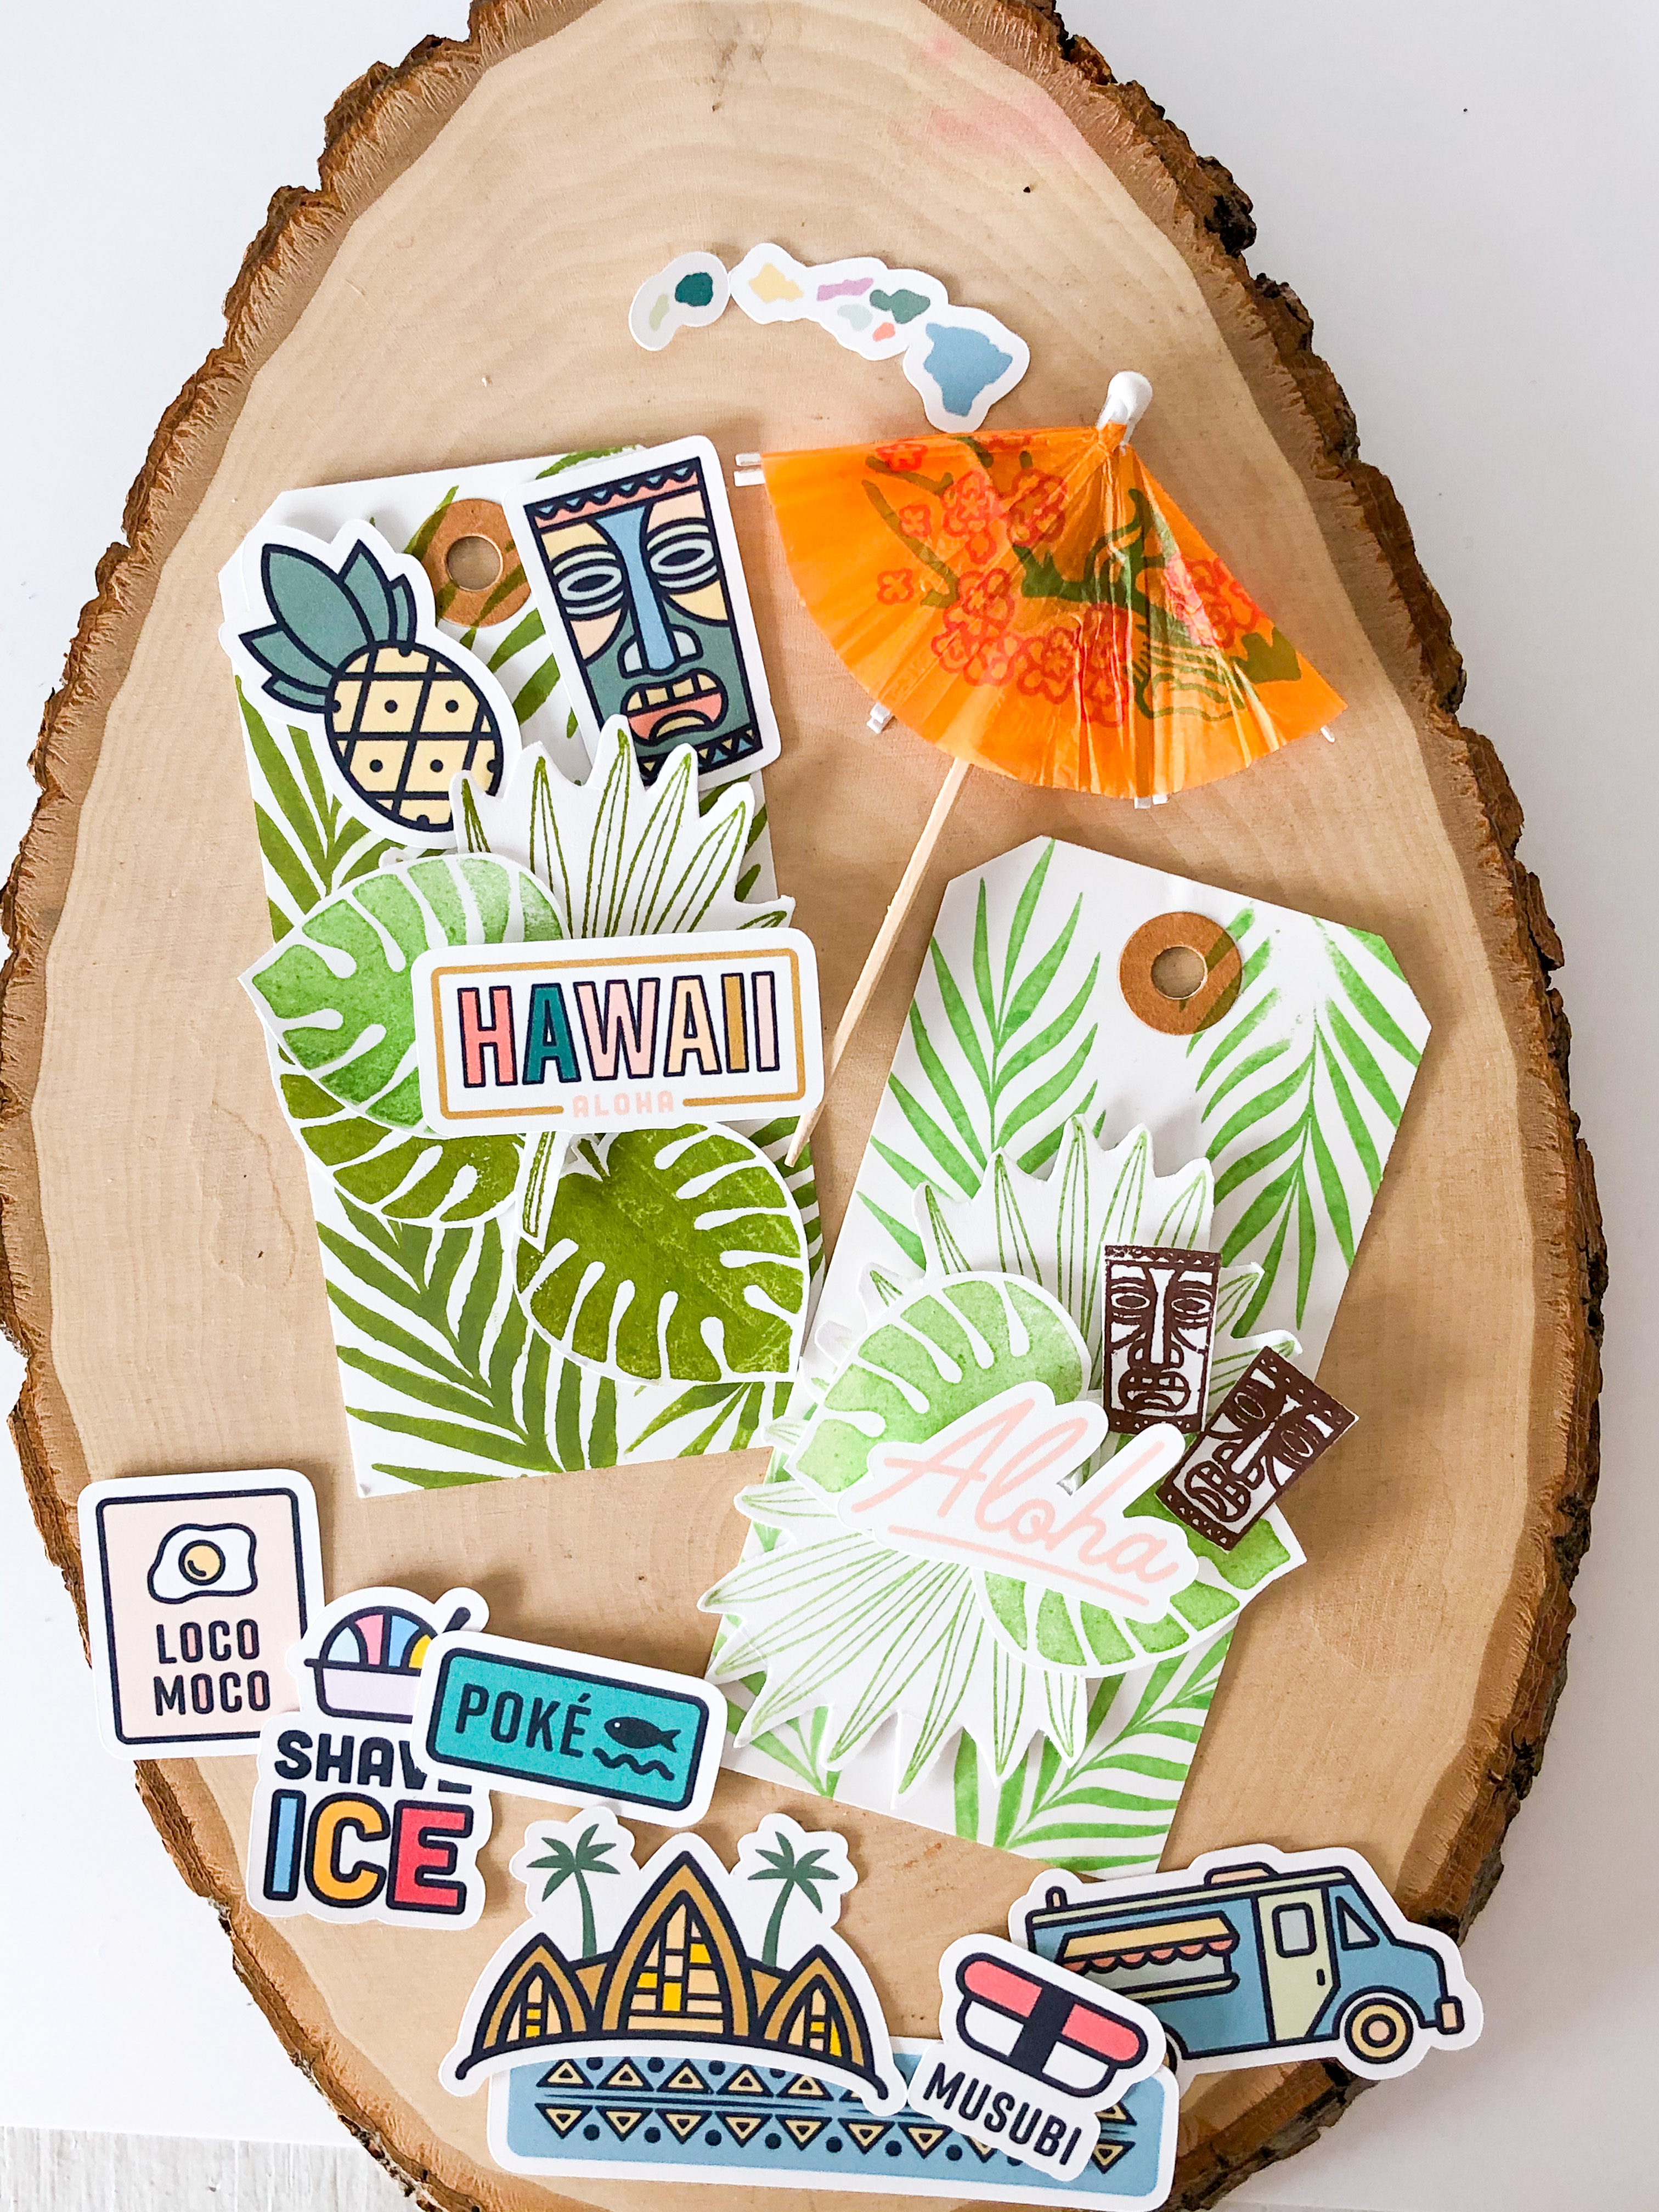
A few items is all you need. Grab some items from your craft stash and lets see what you can make! All you need is some stamps, ink, ephemera, and stickers!
These simple tags were really easy to make. I stamped in various shades of green ink some tropical leaves on cardstock. I fussy cut the leaves out, for layering purposes I used some dimensional foam adhesive. The depth and dimension really add to your project. Allowing yourself to play with shades of one color also add to that depth. When you cannot add dimension through height, play with your color combinations to give that illusion of depth.
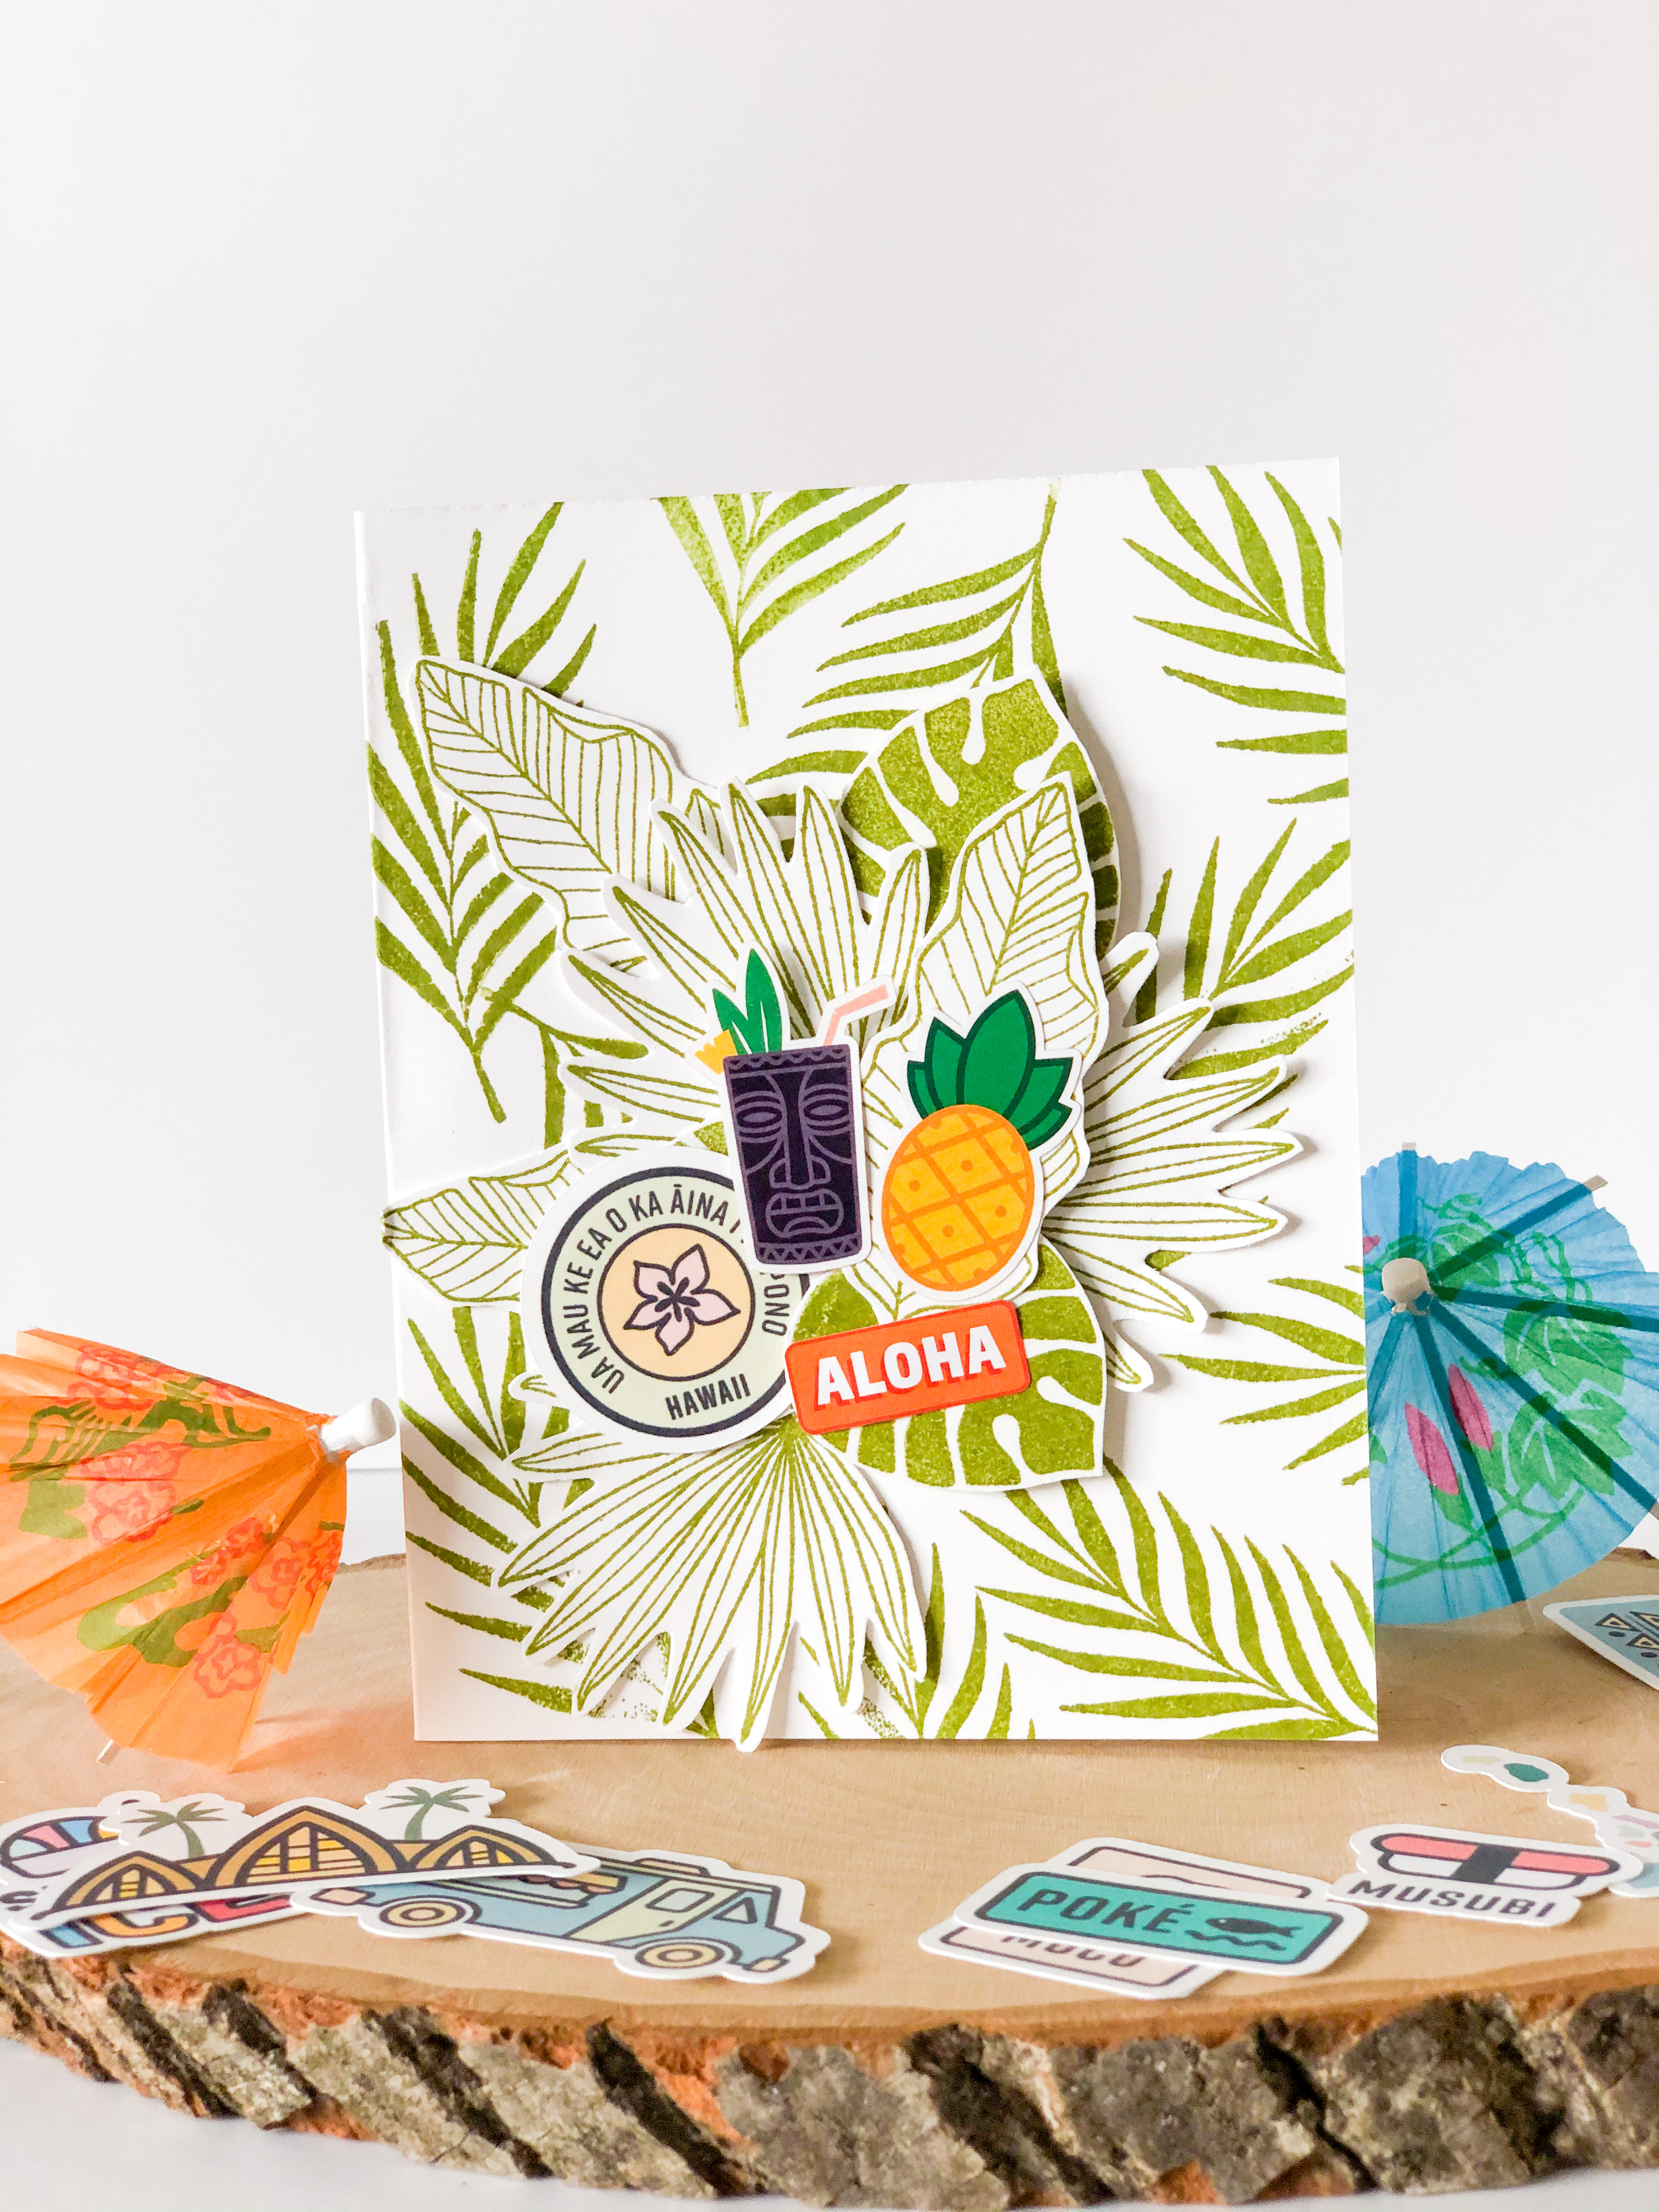
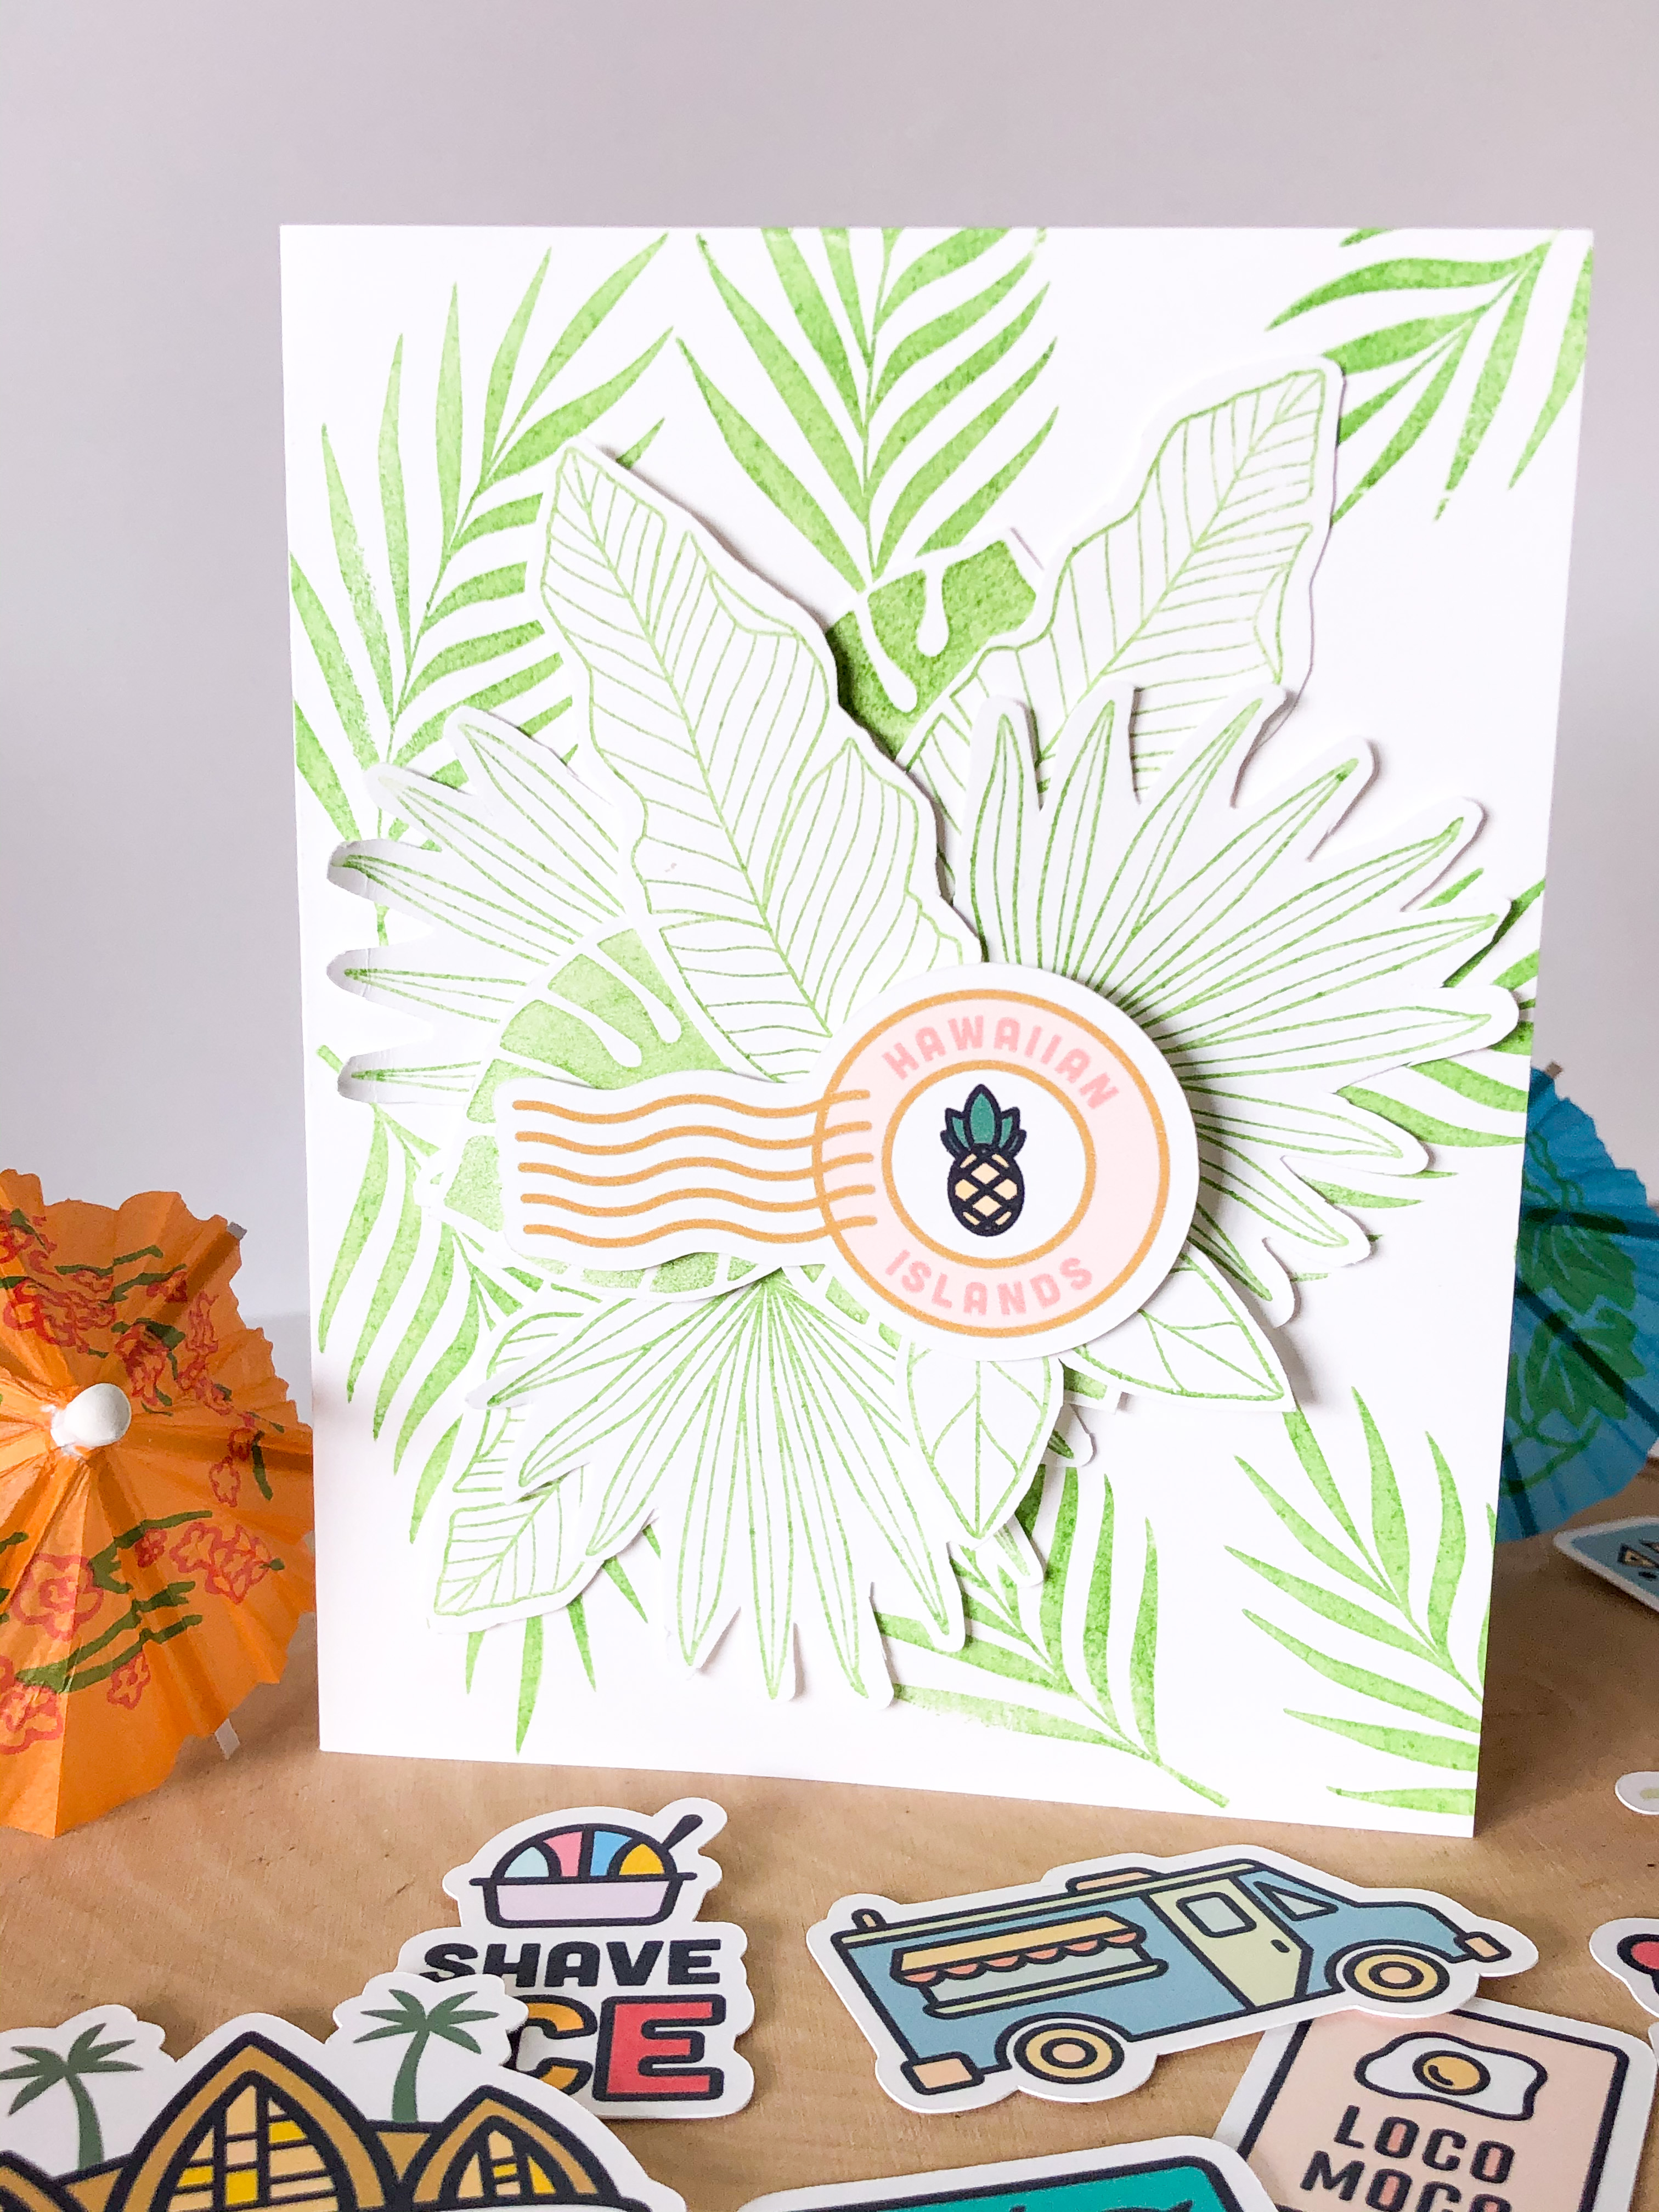
You do not have to reinvent the wheel when creating a card. You can think on a small level like a tag… and just make it bigger on a card scale. For this card I stamped some leaves on the background paper (is is my first layer of dimension), I added some of the tropical leaves I fussy cut out for the tag project. Using the dimensional foam adhesive I started to arrange the leaves in a pattern I wanted. You can see by the shadows just how much depth there is in between each piece.
After arranging the leaves in a pattern that I loved, I added stickers and ephemera to the project. Find an arrangement that brings your eye to the center. I used color to attract the eye. I kept the background designs all one color, even though there are different depths to each piece, it doesn’t distract because of the same shade of green that was used throughout the background. By using the pop of color in the center it brings your eye to the stickers and ephemera.
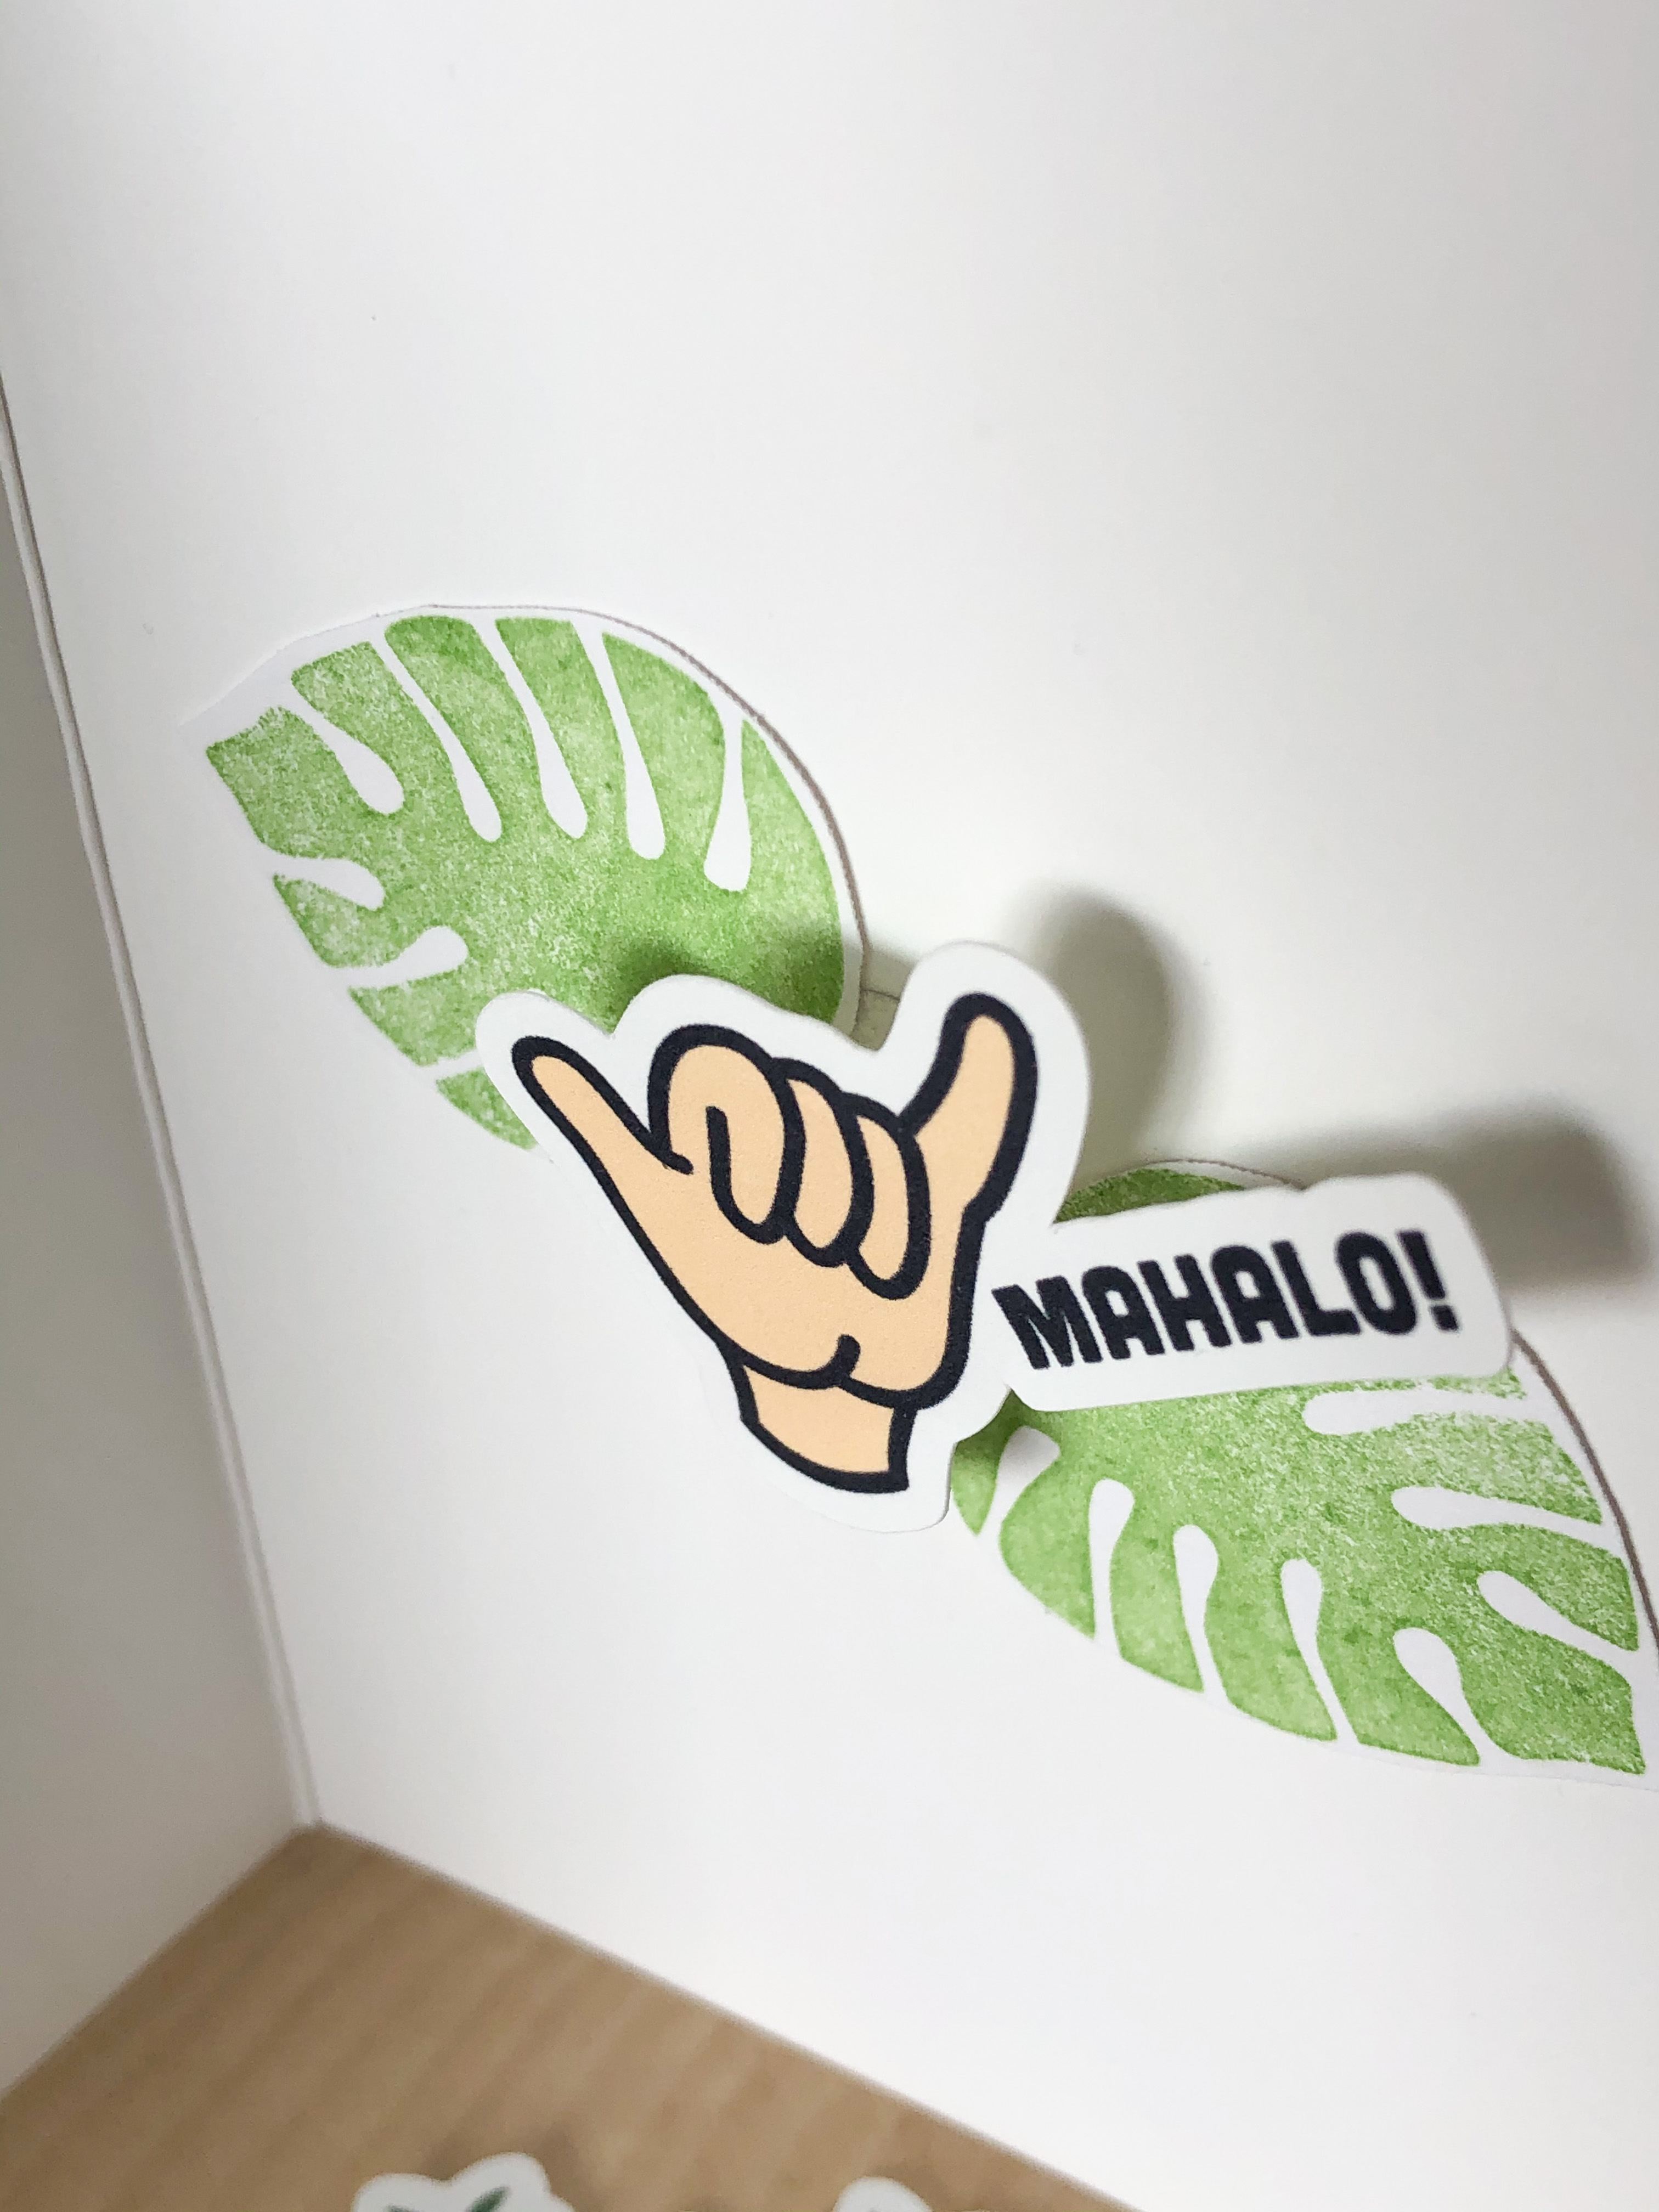
Don’t forget about the middle of your card. I like to add my sentiment there. To mimic the ocean breeze I used an “Action Wobble Mini Action Spring” from Hampton Arts on the Mahalo hand sign. When you open the card it springs into action like its waving “Mahalo” to you! I stamped the two tropical leaves, cut them out and placed them flush on the paper. The action spring already has adhesive on it, one side goes on your paper and the other side your design goes on. It add the perfect amount of fun to a card!
For this card I used the same technique with another shade of green ink. I wanted a more pastel green since the center piece I was going to use was more along that pastel color family. I once again placed my paper pieces of leaves and added dimension when adding my center piece.
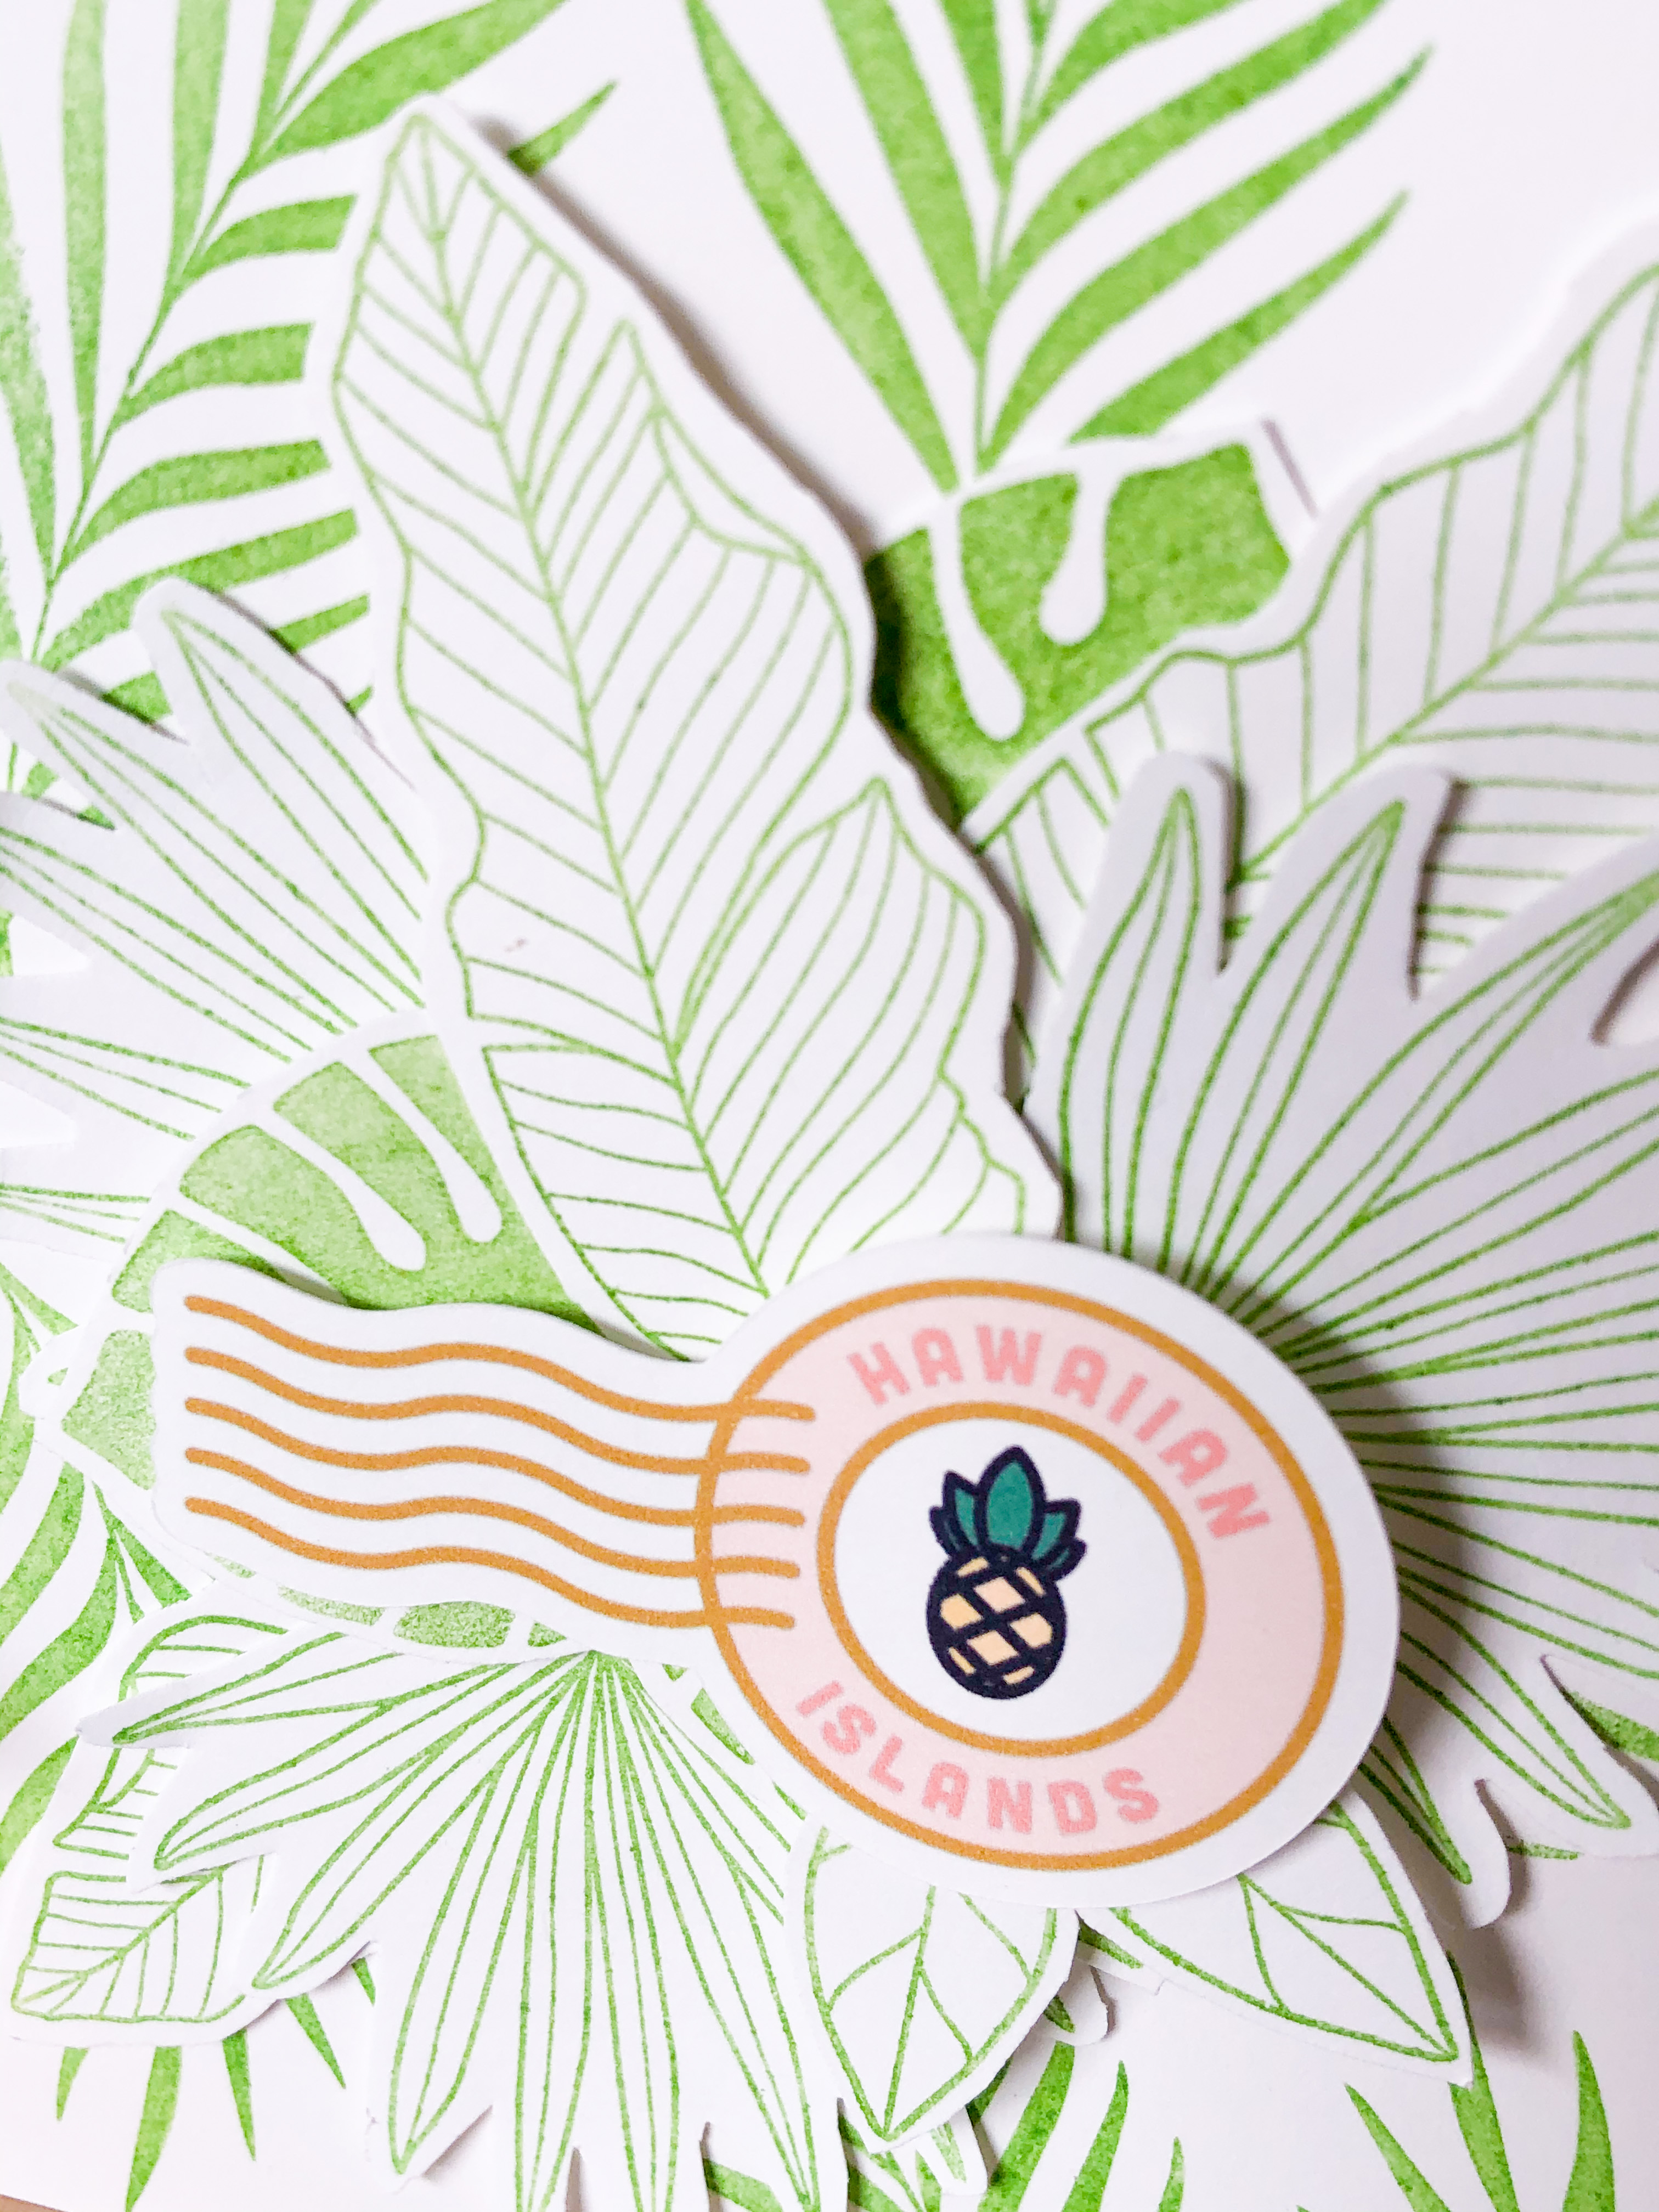
This perfect Hawaiian Islands postage stamp is adorable. I just love the way it pops on this card! I have about a million more ways I want to use it!
These tags are perfect for gift wrapping, on party favors, as gift card holders, or in your card making. The cards are easy to make. A little layer goes a long way the you are designing. I hope you now have a few ideas of how to use and layer your items on projects. Have fun creating!
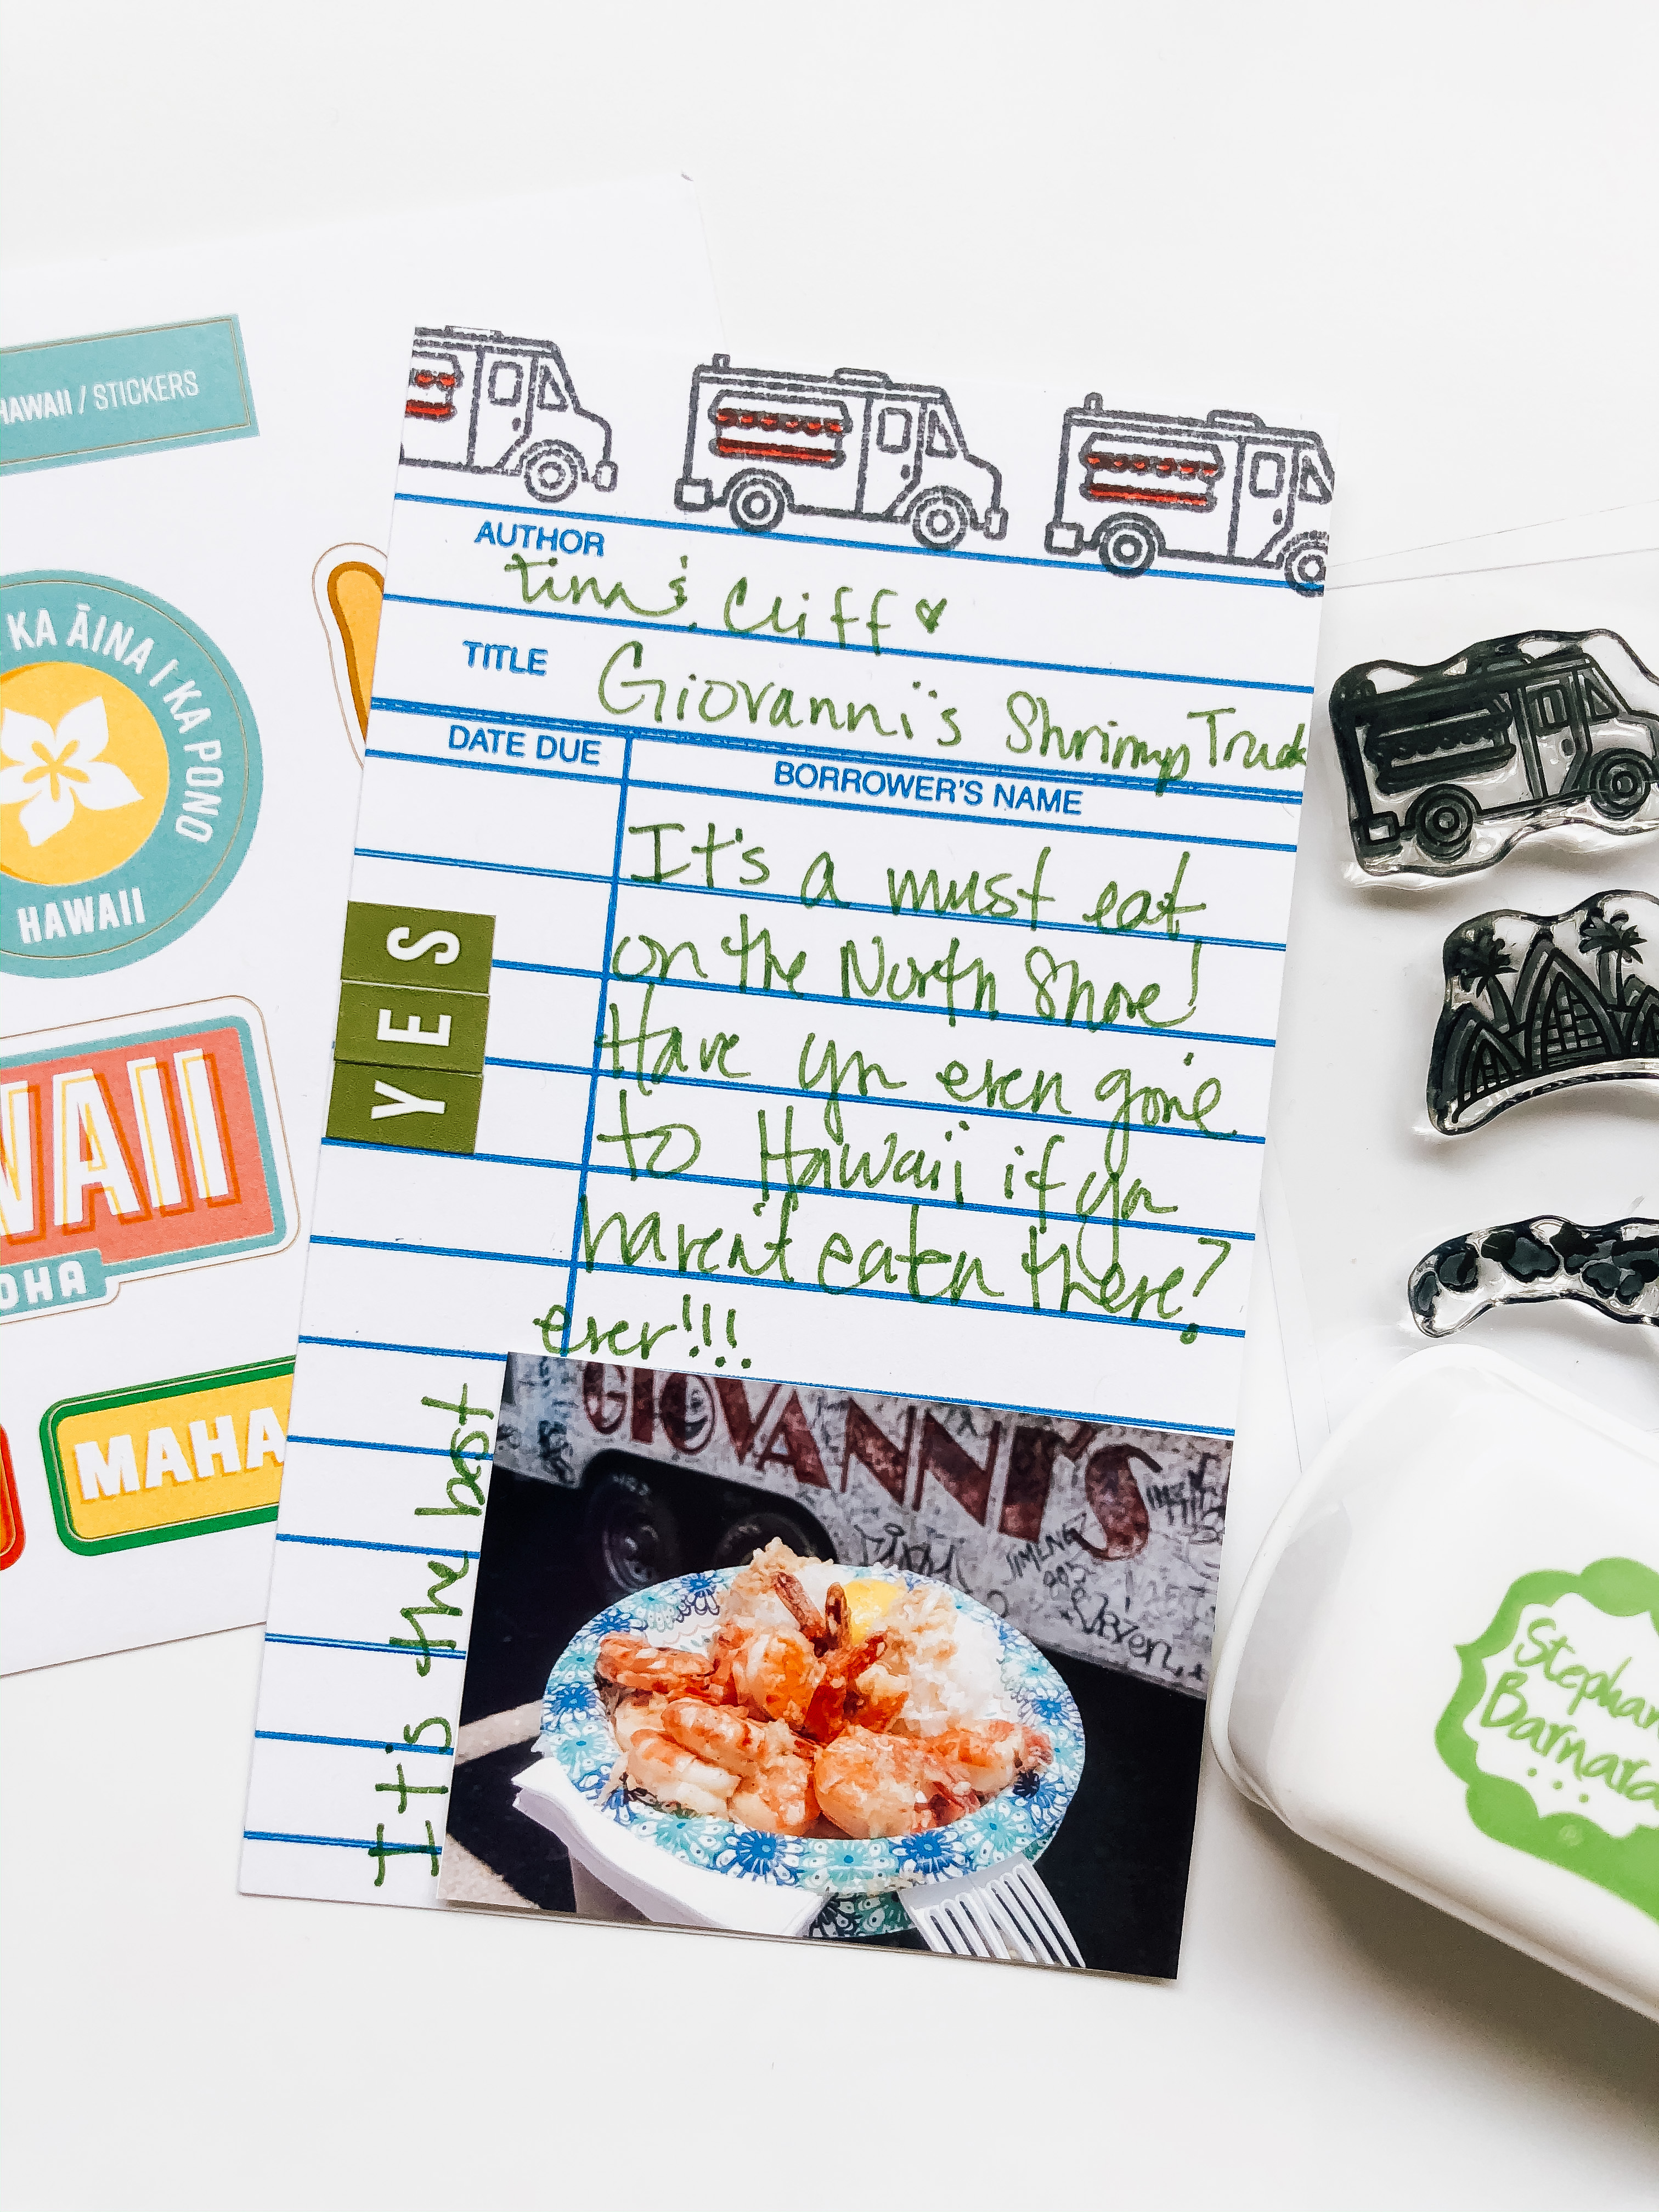
Dreaming about your next dream vacation? How can we not help but browse the internet for somewhere dreamy? Not sure about you, but I become a professional foodie when I go on vacation. Instead of my memory planner looking like a memory planner, it would look like a Yelp page with all the food pictures! I have a creative way to document all the good food you eat on vacation. I am using all of the Hawaii food themed stamps from our shop Social Paper Plan along with some simple supplies that you most likely have on hand already.
First Tip: Stamp a colorful background! I used some bright ink in various colors to make a background pattern that would compliment the picture of shave ice. The best parts you don’t have to color the stamps in with markers.. just stamp away in different colors!
Second Tip: Make a simple foodie list to rate your plates! I stamped some of our food icons and colored them in with markers. I used them as bullet points and then journaled my thoughts about each dish. Its like your very own Yelp review!
Third Tip: I used the Shrimp Truck icon as a journal card header. At the top of the card I stamped a header of trucks. It’s simple but it brings the whole design together.
FourthTip: Layer your stickers on top of your stamps! Stamps and stickers are friends! I used a couple of our stamps to make a background in more muted colors and then layered some bright stickers on top! They don’t compete because the stickers were meant to stand out. Hawaii is deserving of a whole page dedicated to their tropical drinks. Am I right or am I RIGHT????
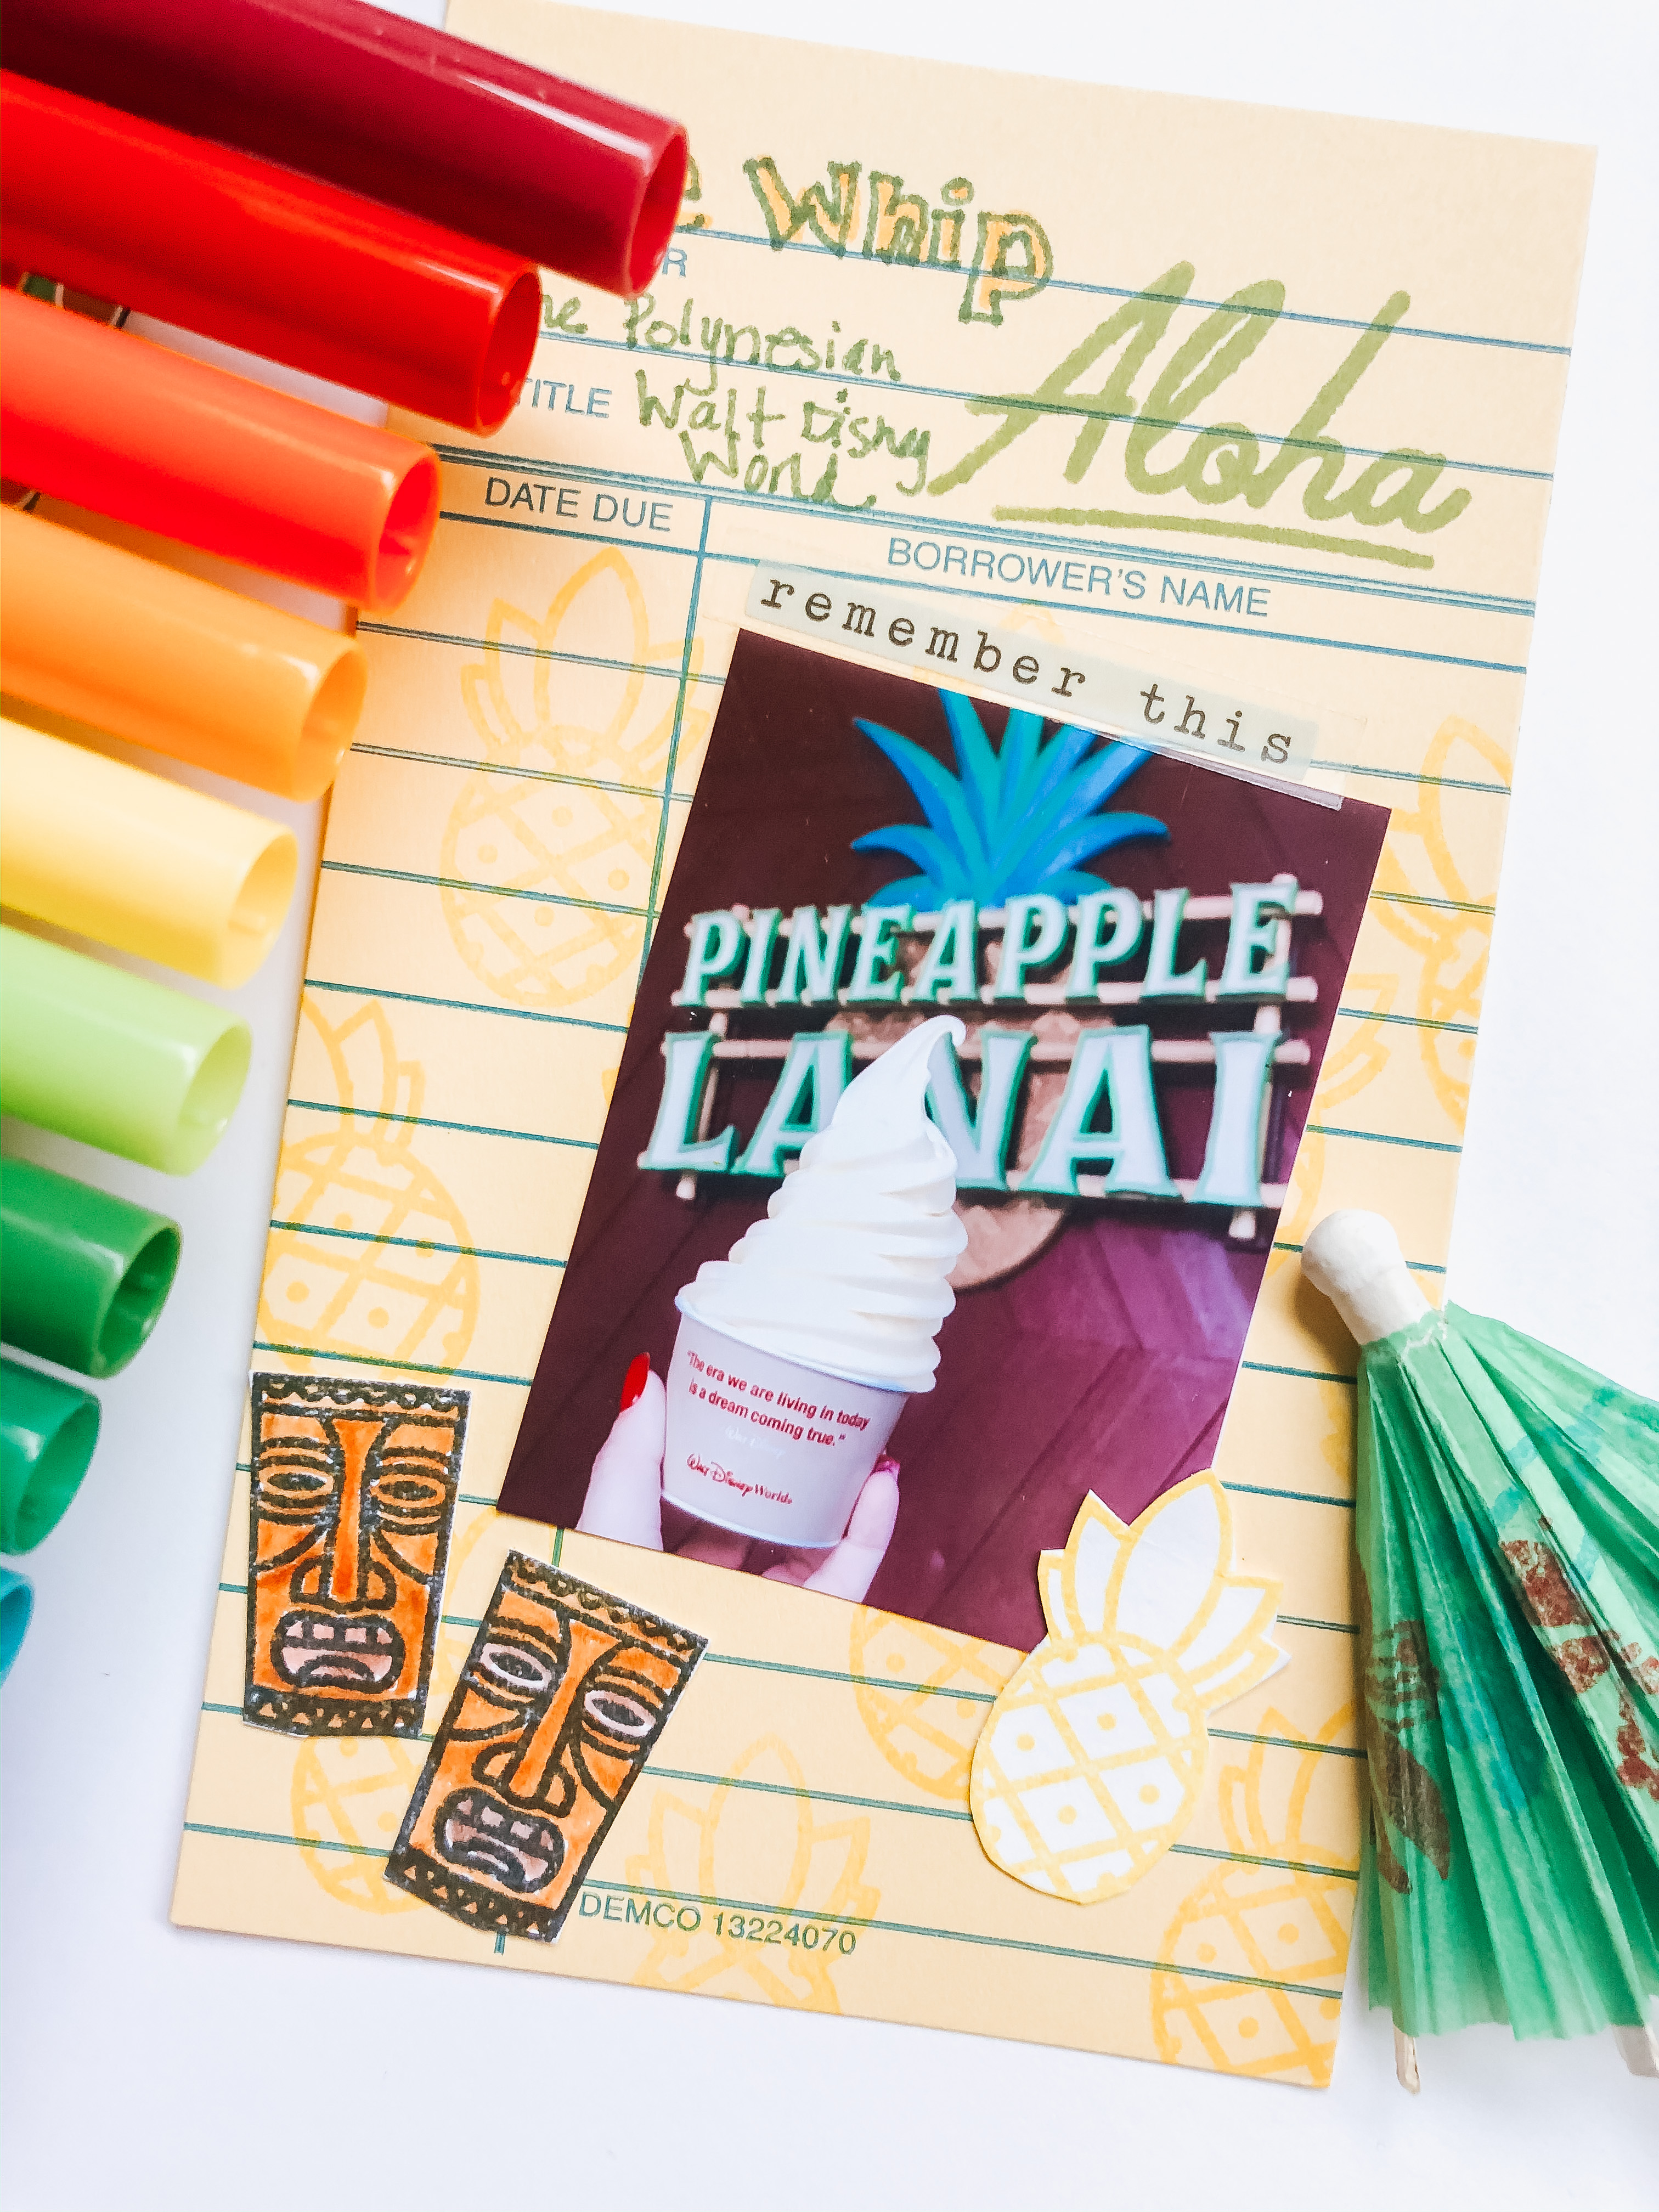
Fifth Tip: Stamp and cut out your icons! My background card was yellow so I used a yellow ink to stamp the pineapples… I wanted the pattern to be subtle. I wanted the picture to take center stage. To bring it all together I stamp a pineapple and cut it out and placed it over the picture. Just a simple way to tie it all together.
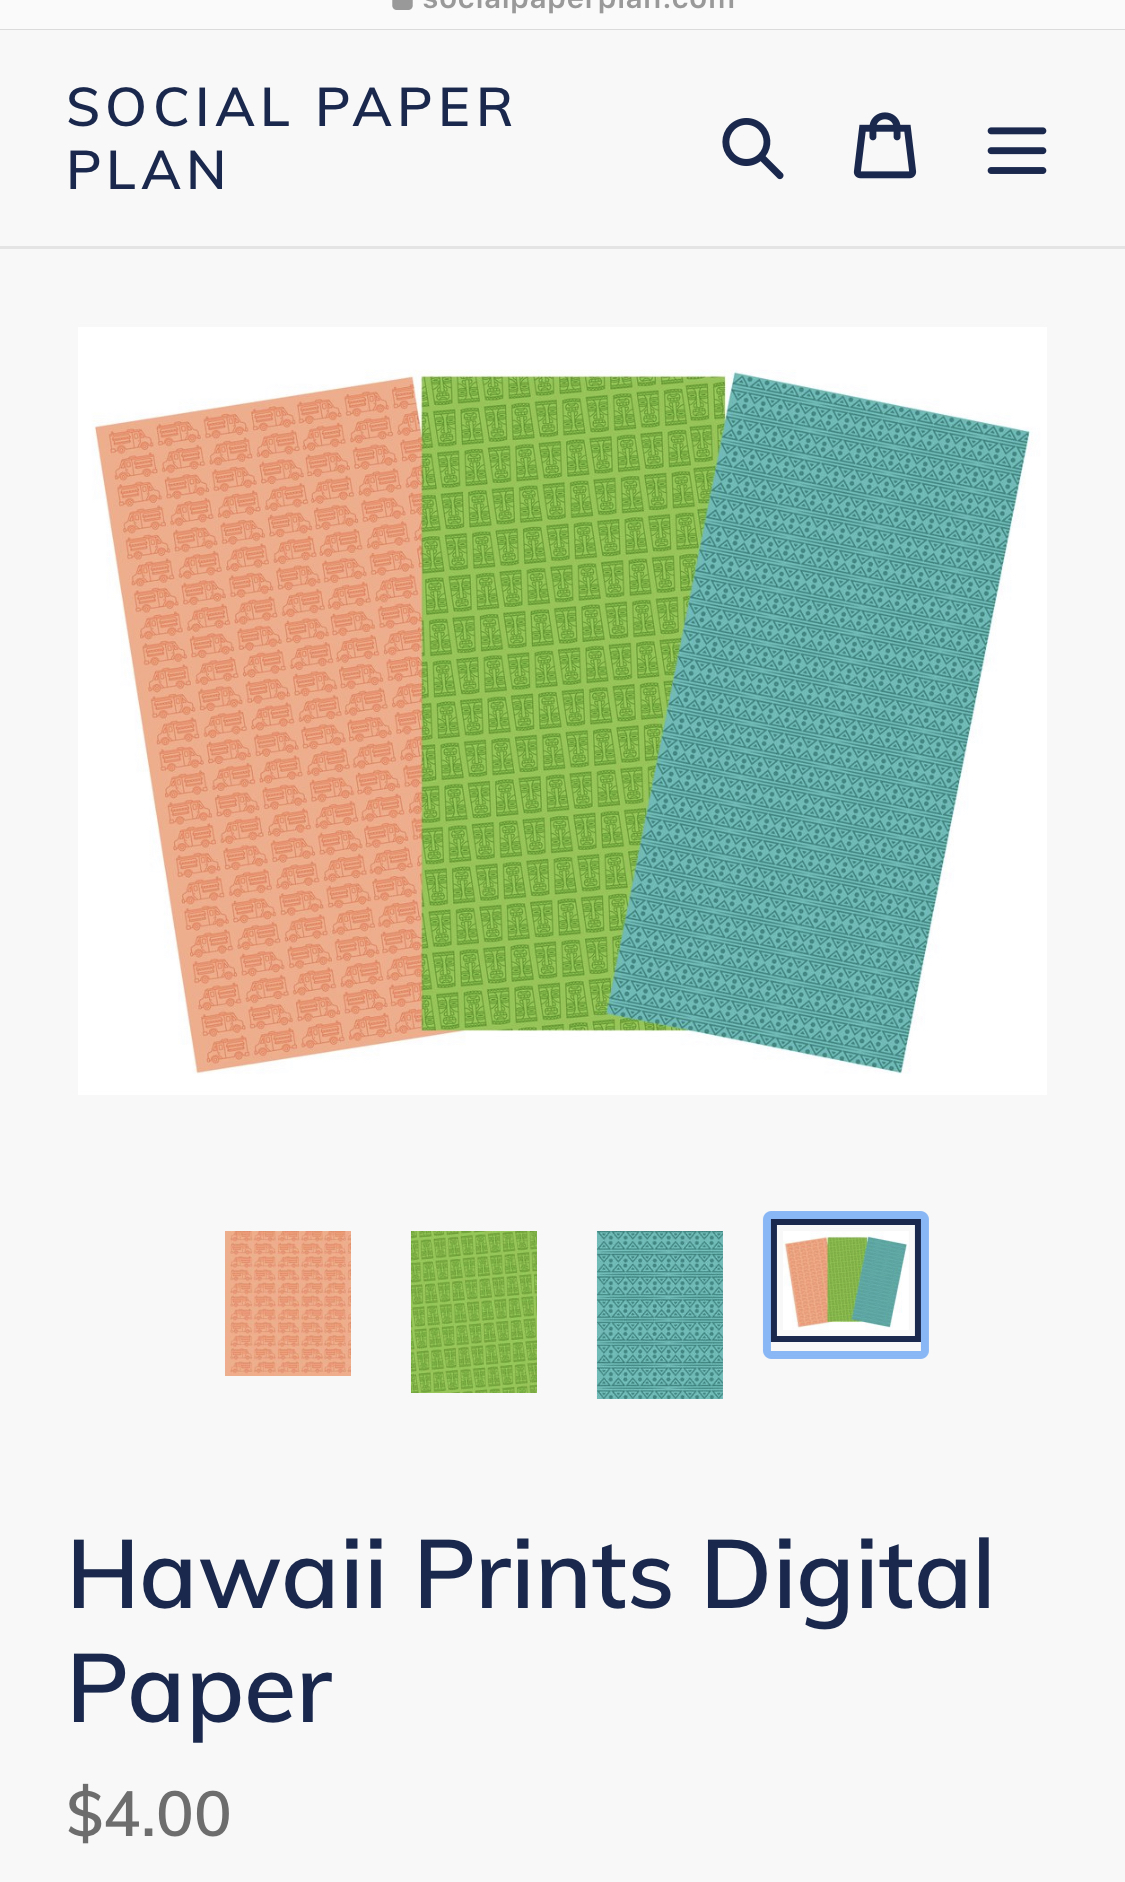
Have I not convinced you to be stamper? Pattern paper is always there to help you out! When in doubt… print it out! Digital paper is readily available at your fingertips!
Hope I inspired you to use your stamps in some creative ways. I think they are some of the most creative verstile tools in your arsenal. You can use stamps a million times and always come out with a million different designs!